
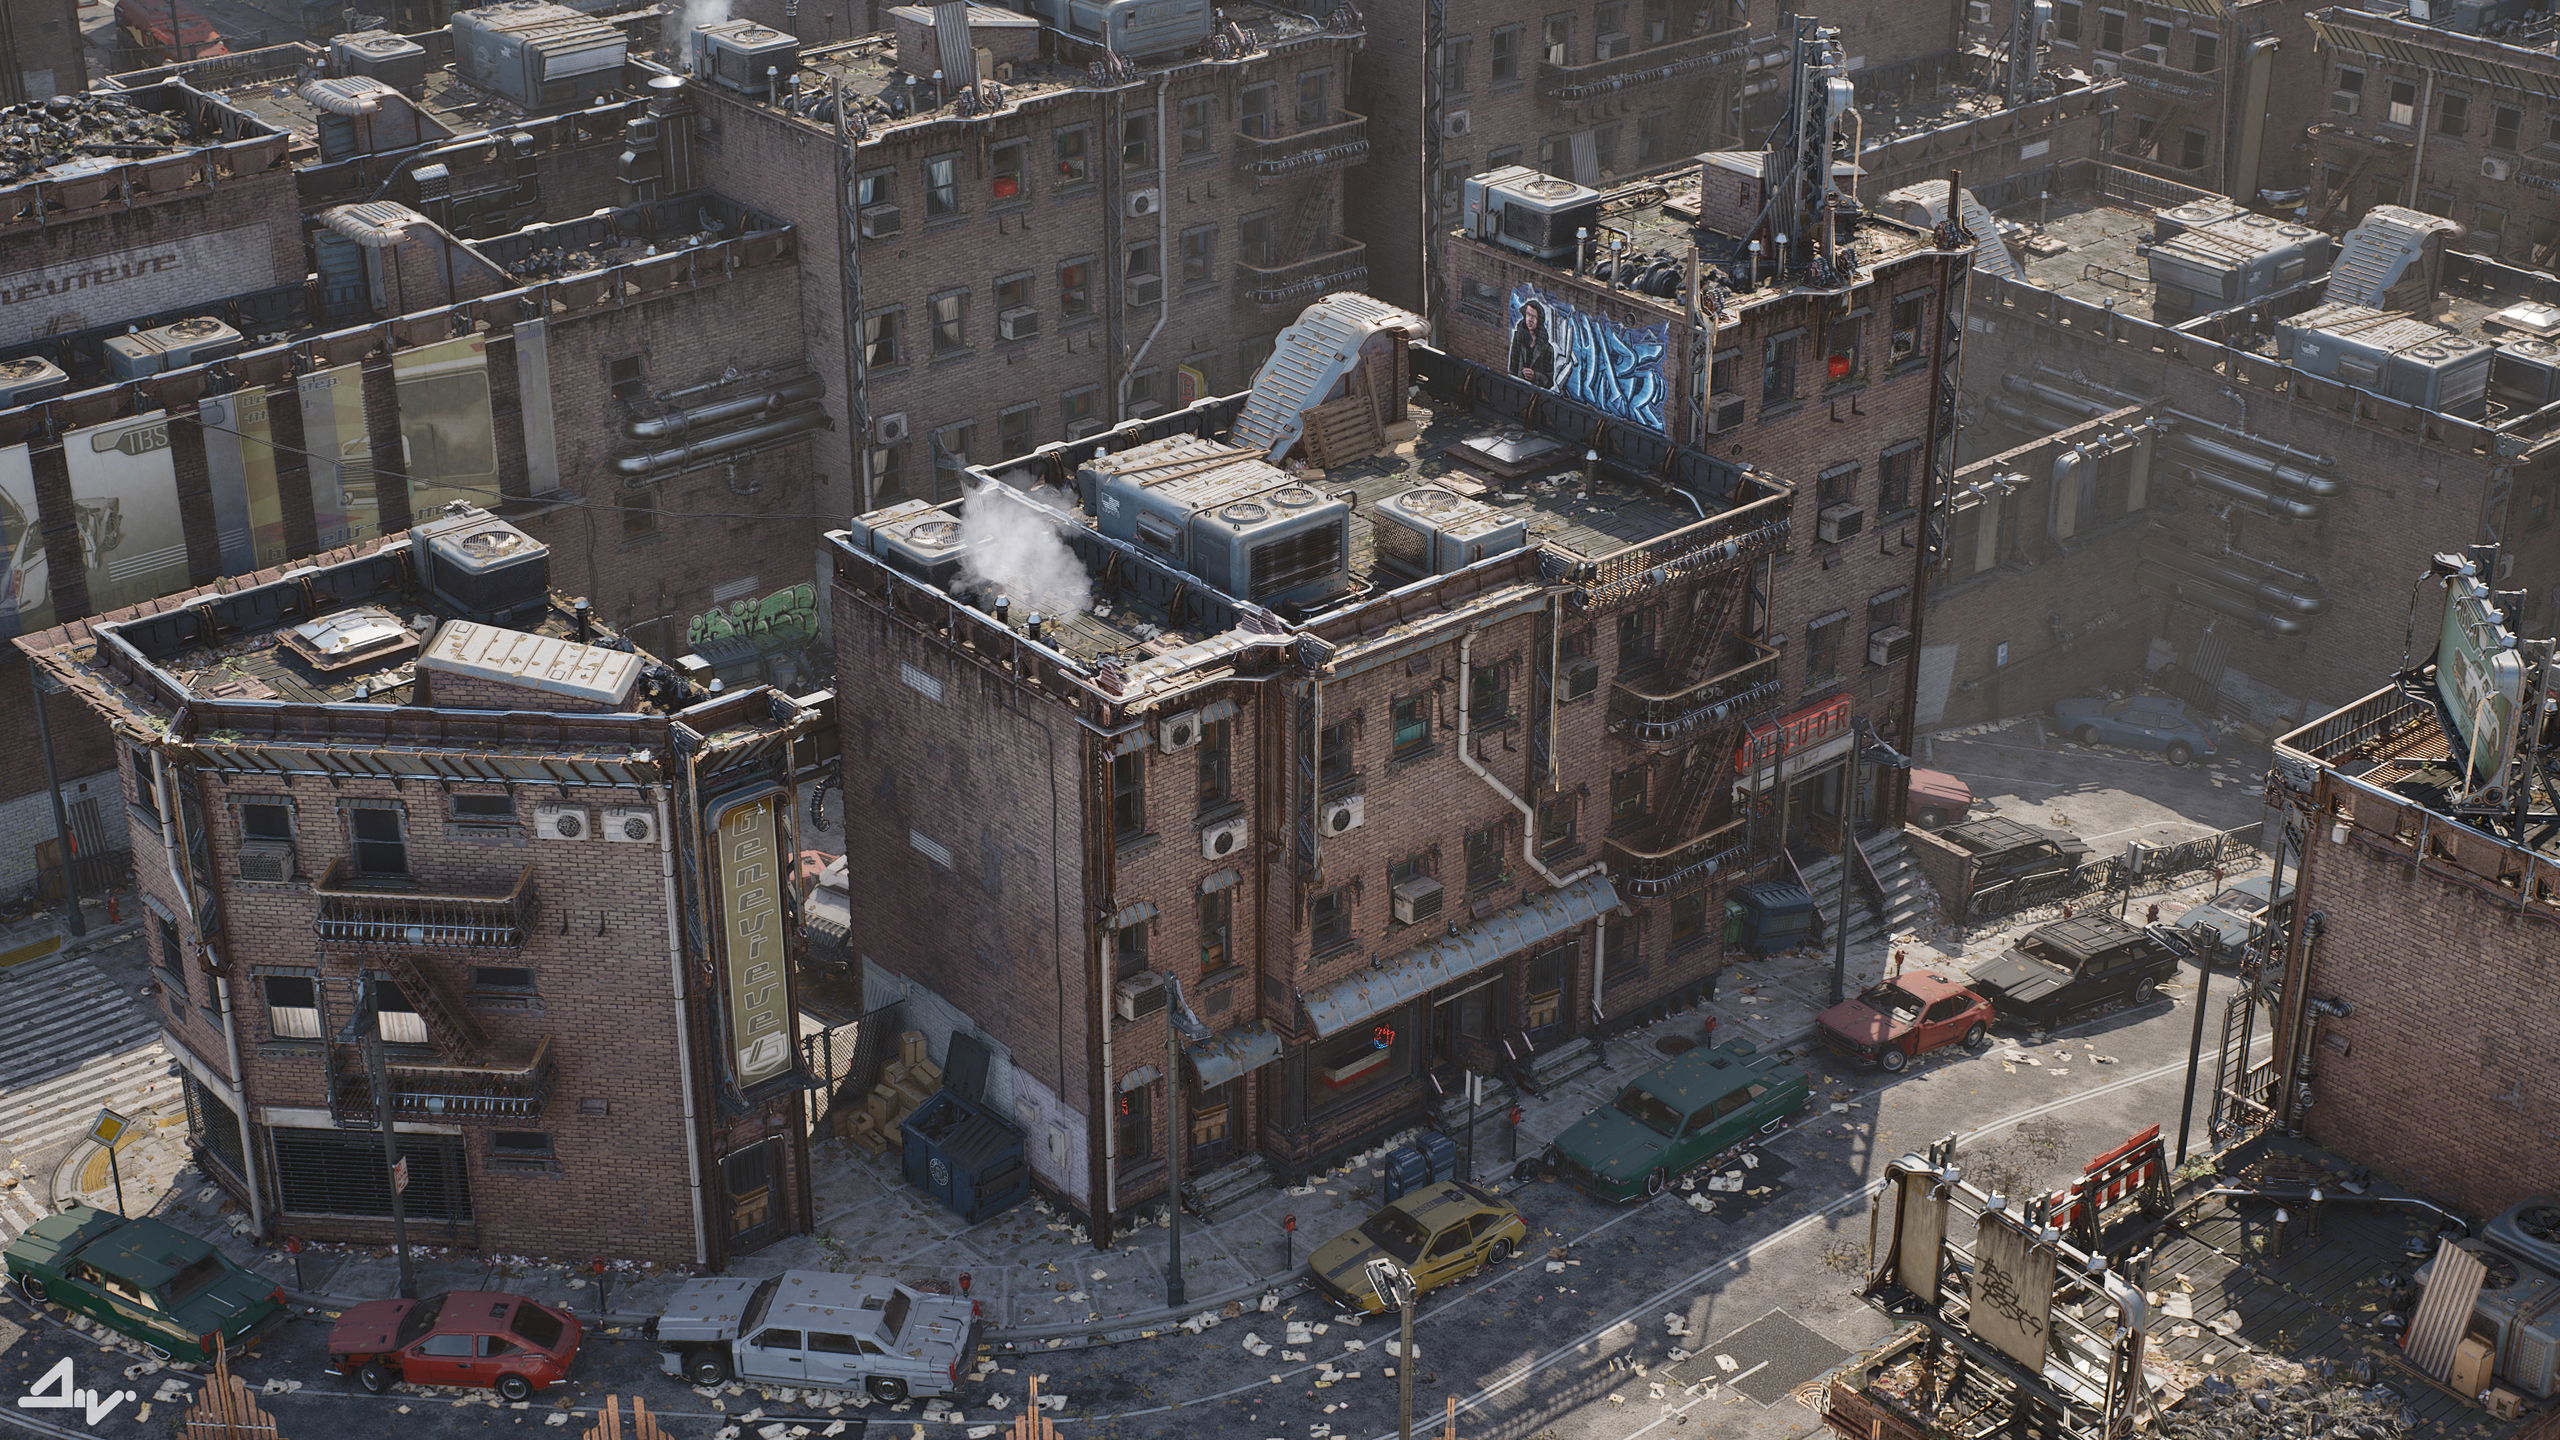
The Projects - A Modular UE5 City
by Filipp Sparak
Hello,
There is a time you get an idea and it starts as something small, something contained.
Then time passes and as this idea keeps cooking in your head throughout the day, you add more and more stuff to it.
So you keep cooking, and all of a sudden it starts branching a bit too far out in multiple directions at once.
This is where you are left with a choice: either to cut those branches and settle, or to let them grow a bit further.
The goal
With this personal piece I chose the latter.
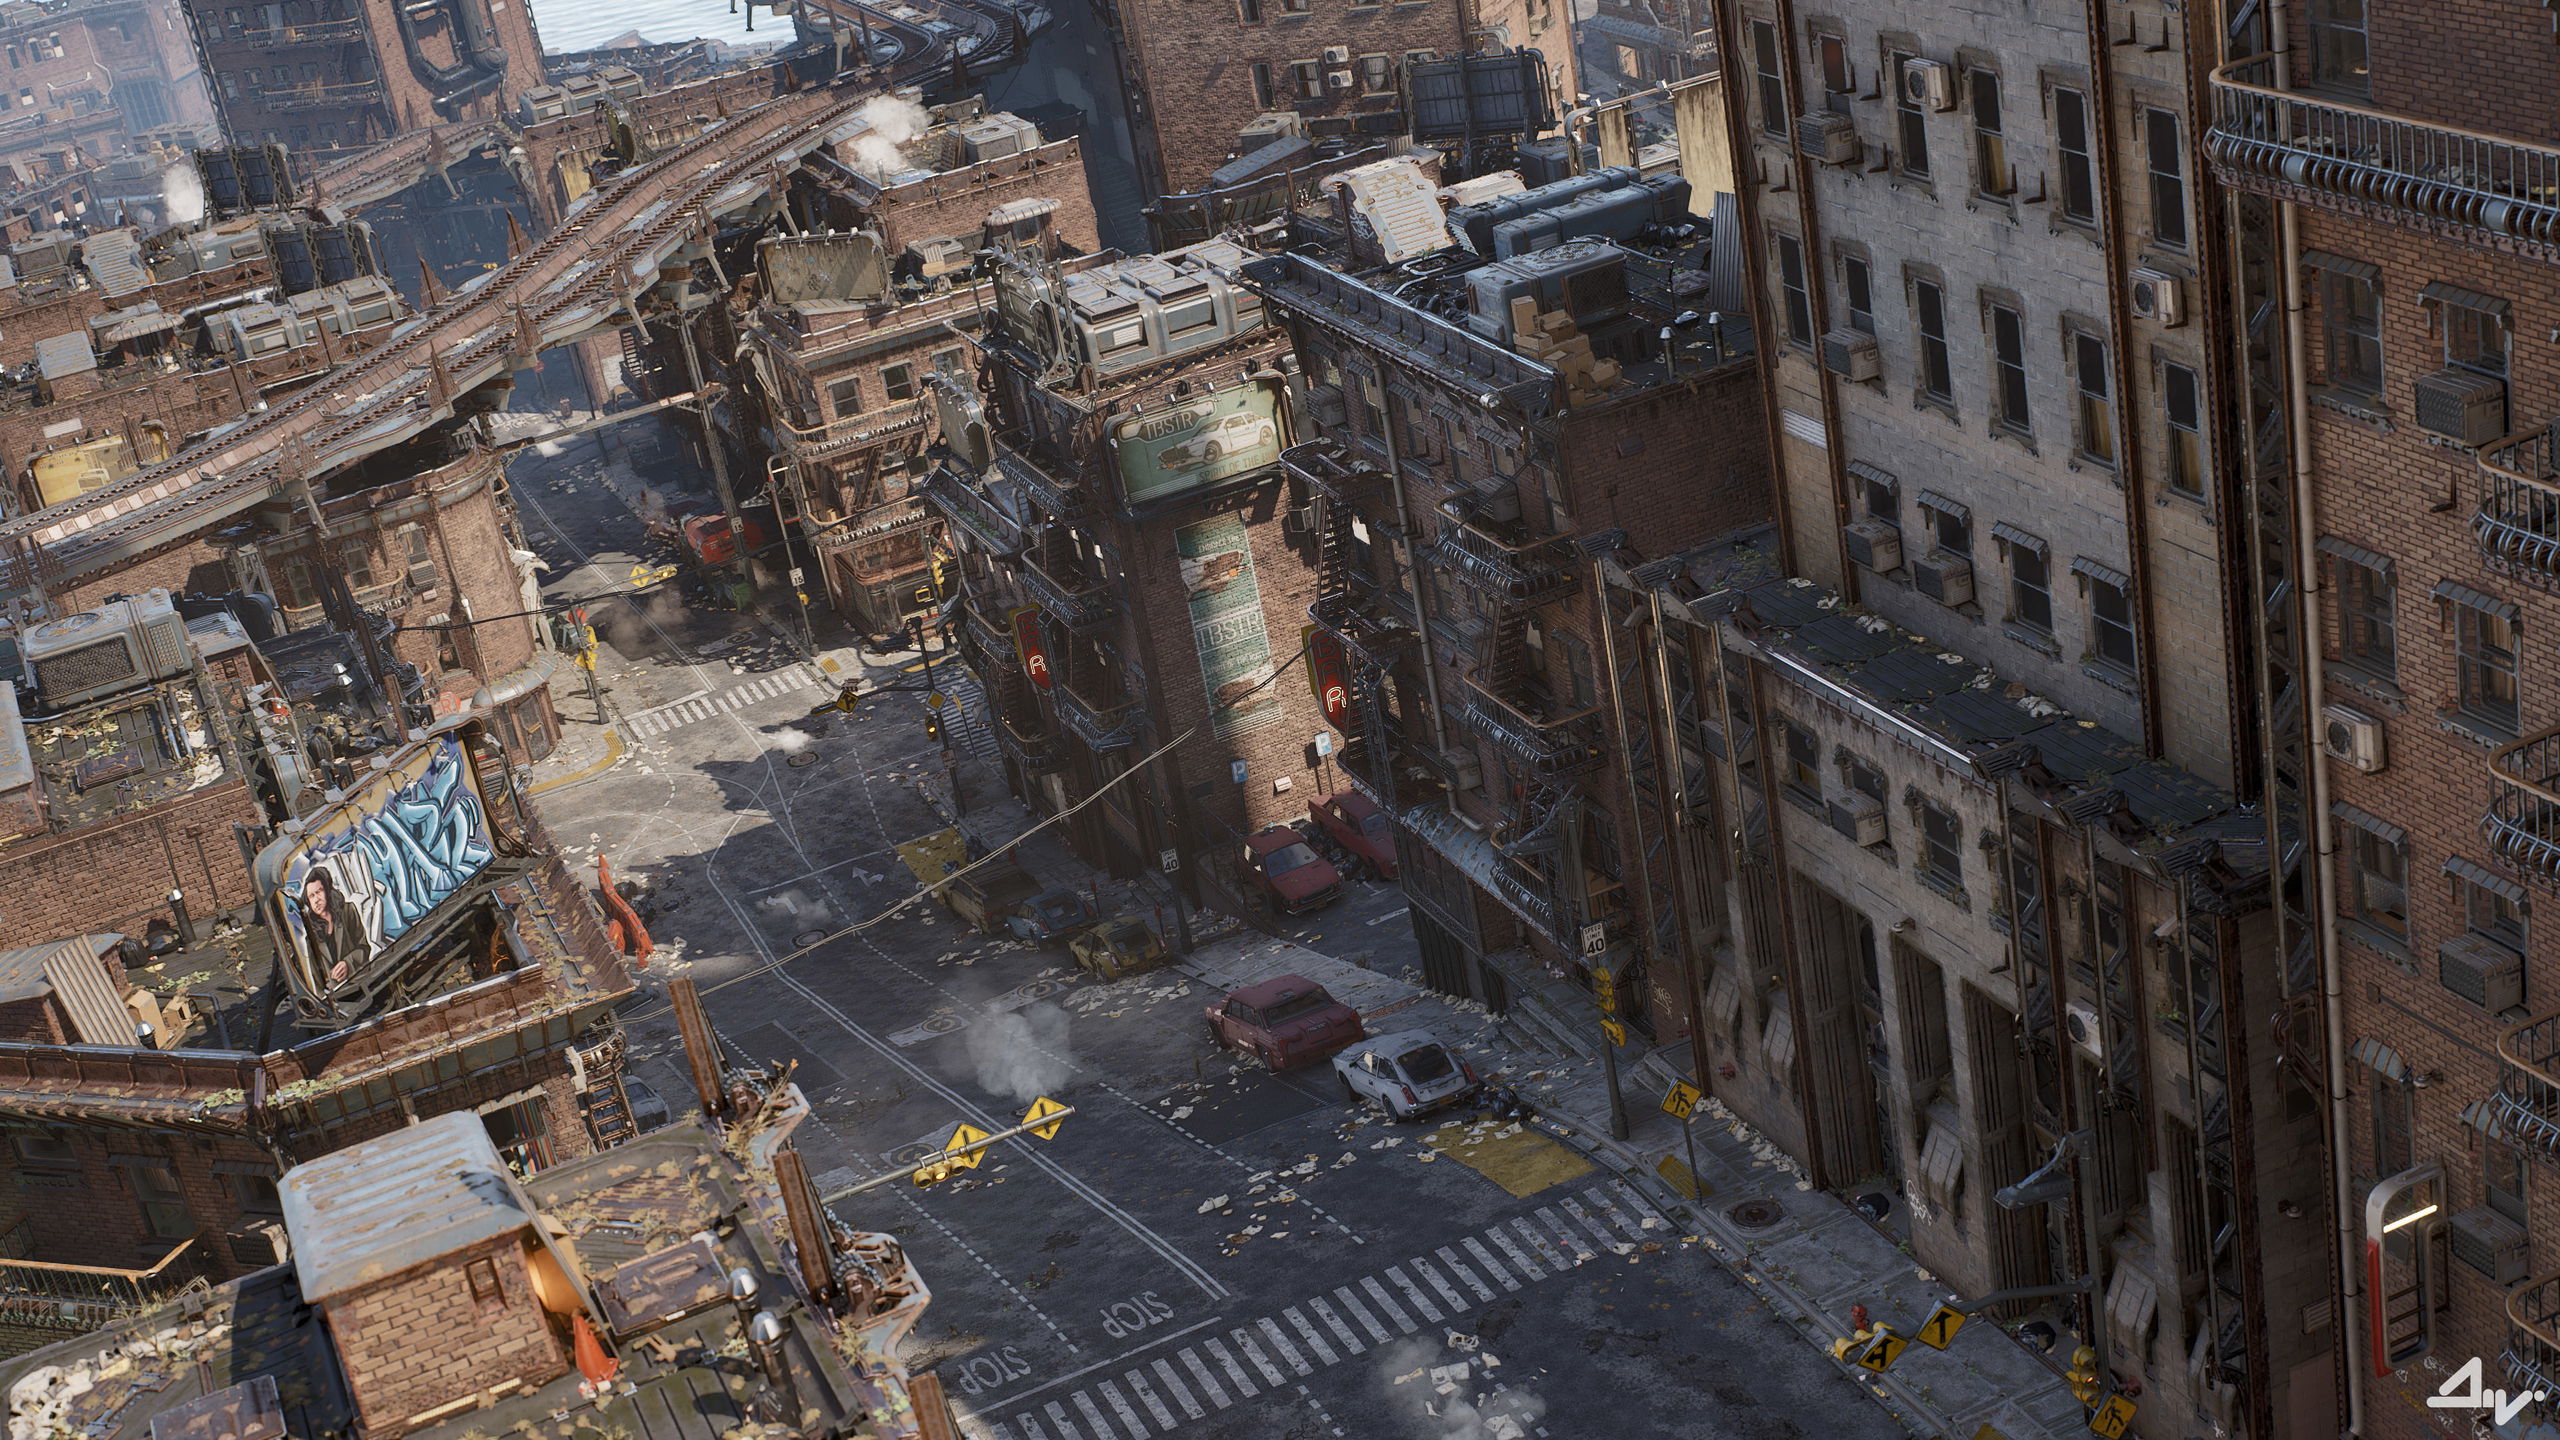
It was however small and contained at first, just one city block I told myself, but then the more buildings I kept adding to the background to fill what was vista at the time, the more I realized this was the perfect opportunity to try accomplishing something I've never attempted before.
An actual functional city with enough detail to aim for either cinematics or first person perspective projects and to top it off with unique interiors accurate to the structure of the building they were in.
The prep
So it began.
With limited knowledge of the technical side of things, performance for the visual quality level I wanted to achieve, instancing, World Partition, or even a rough time estimate I wanted to allocate to this environment, I also wasn't even sure just how many blocks I'd be able to lay down and eventually bring to the finish line before my computer would refuse to compute any longer.
The best thing I could do at this point was to lay down a few rules so that at least it would be easier to backtrack, redo, cut and optimize stuff in the future:
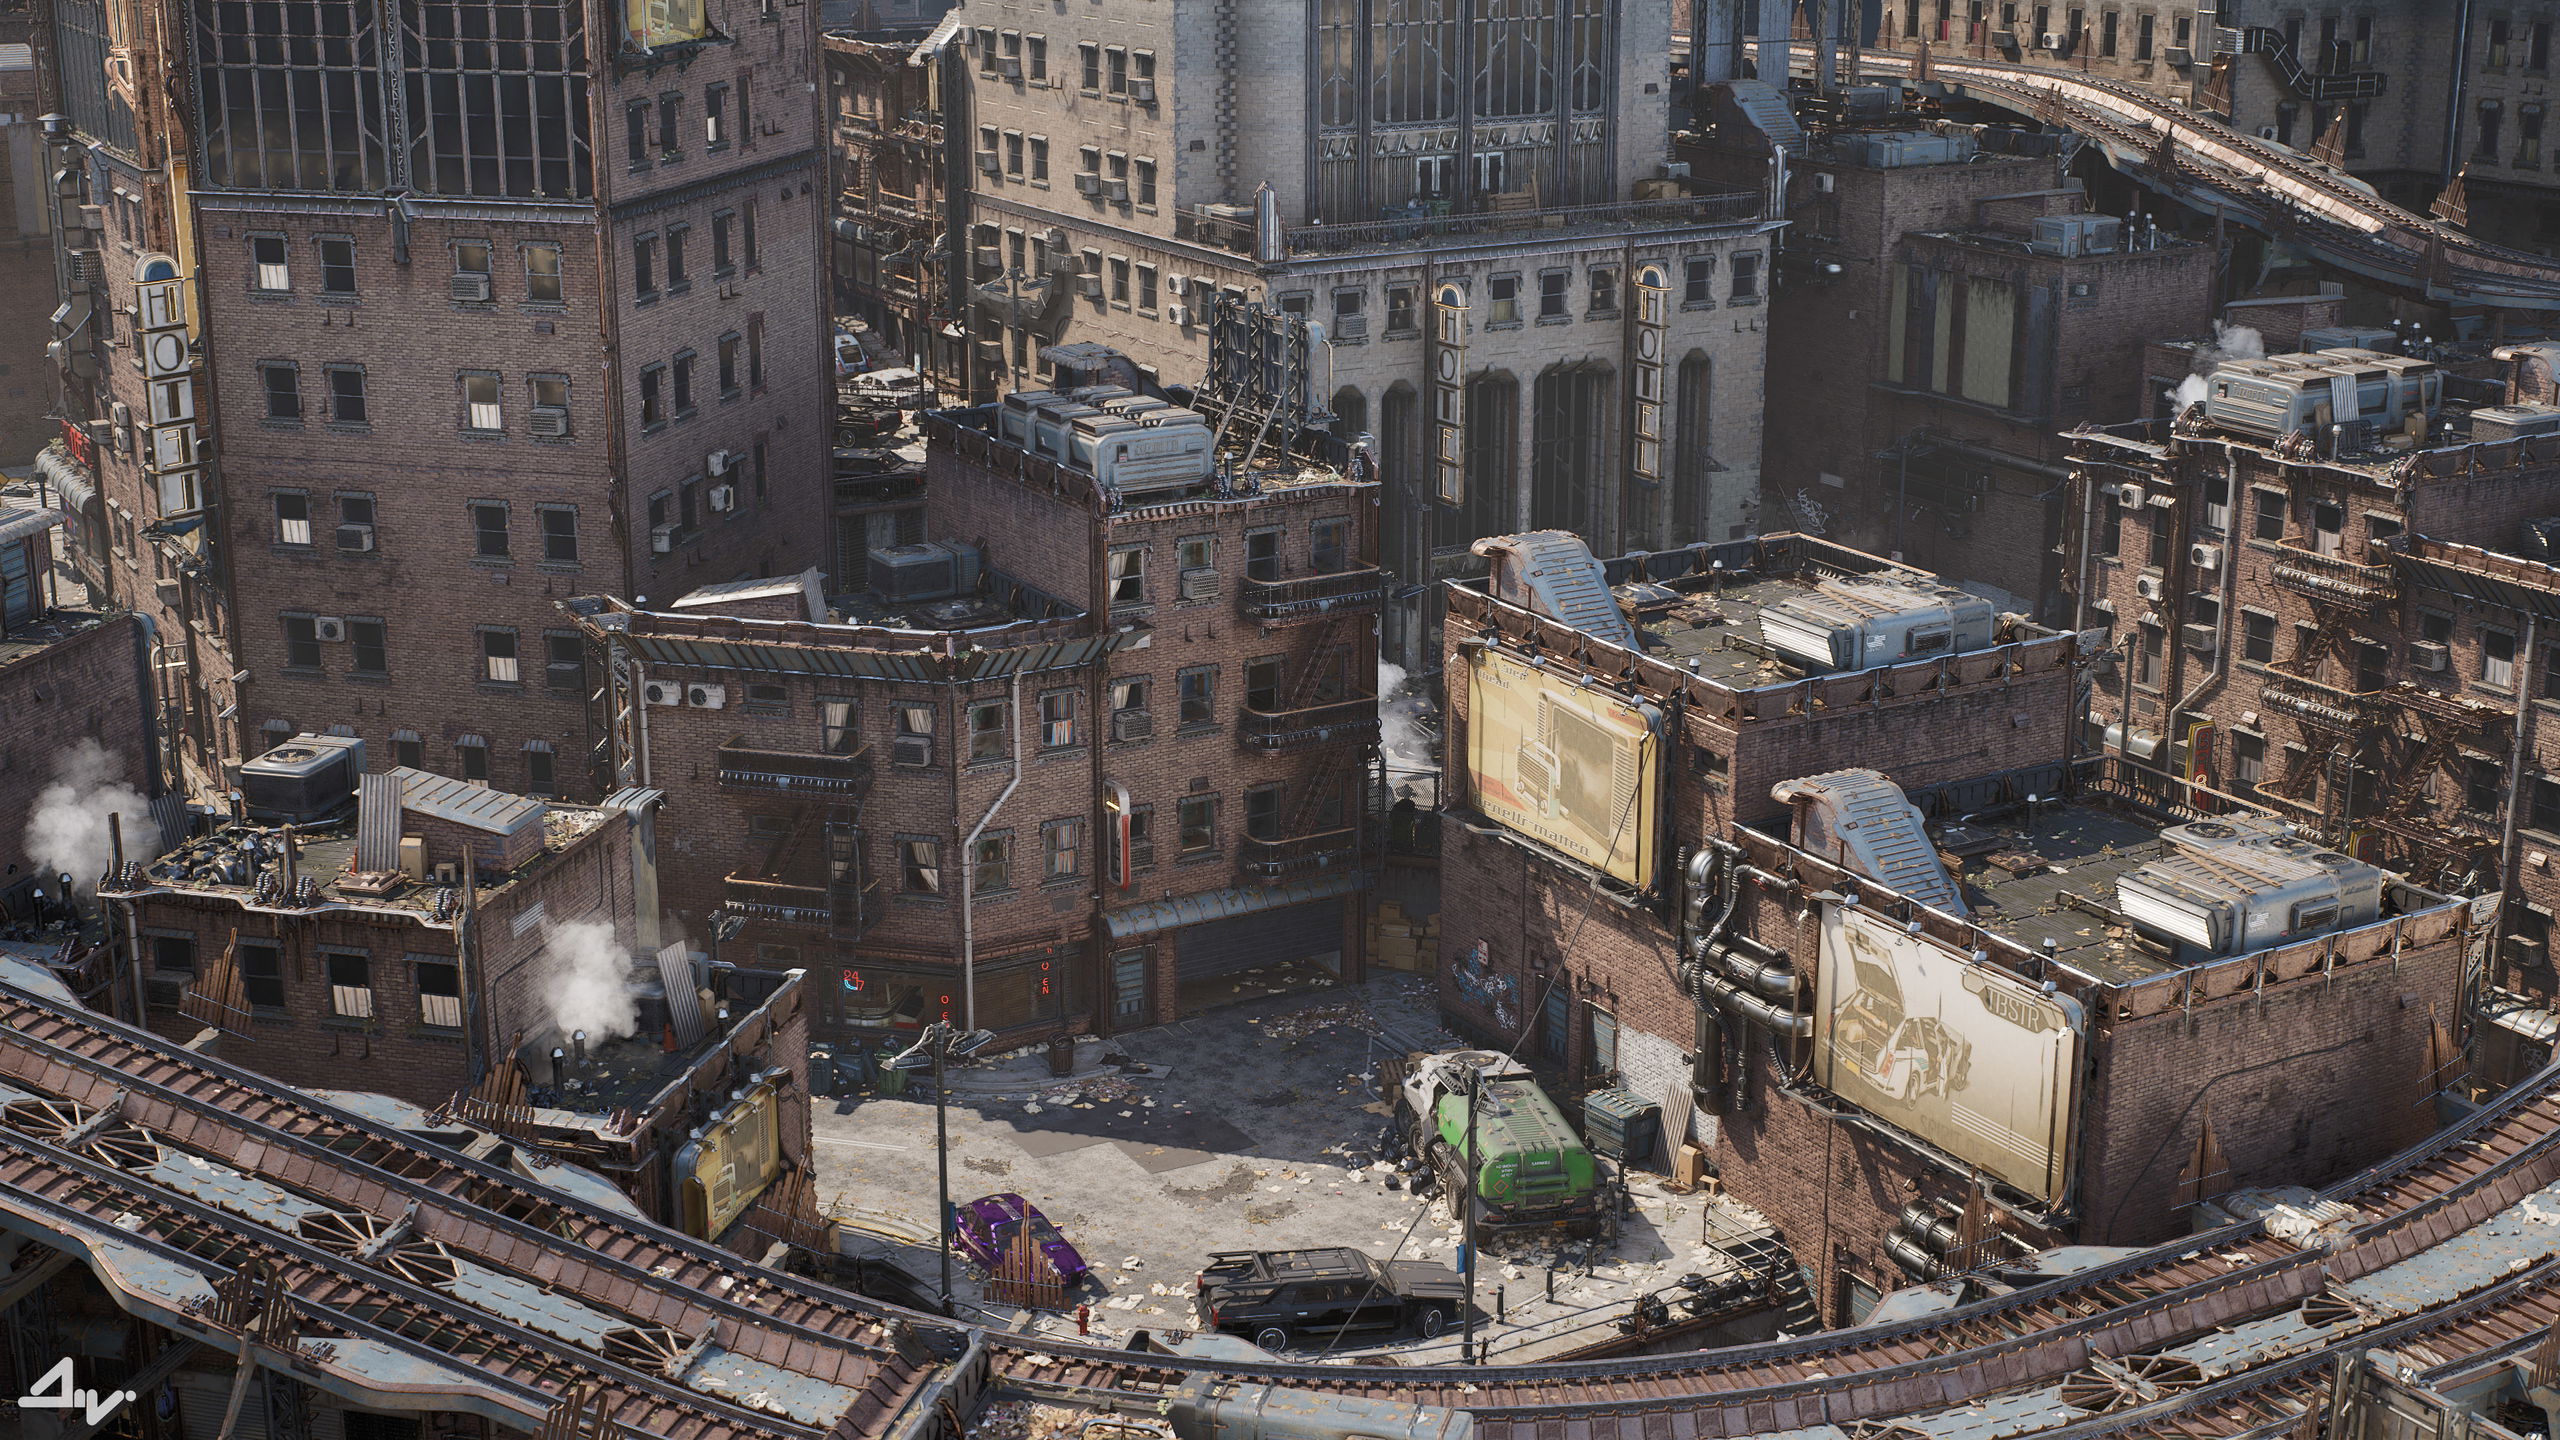
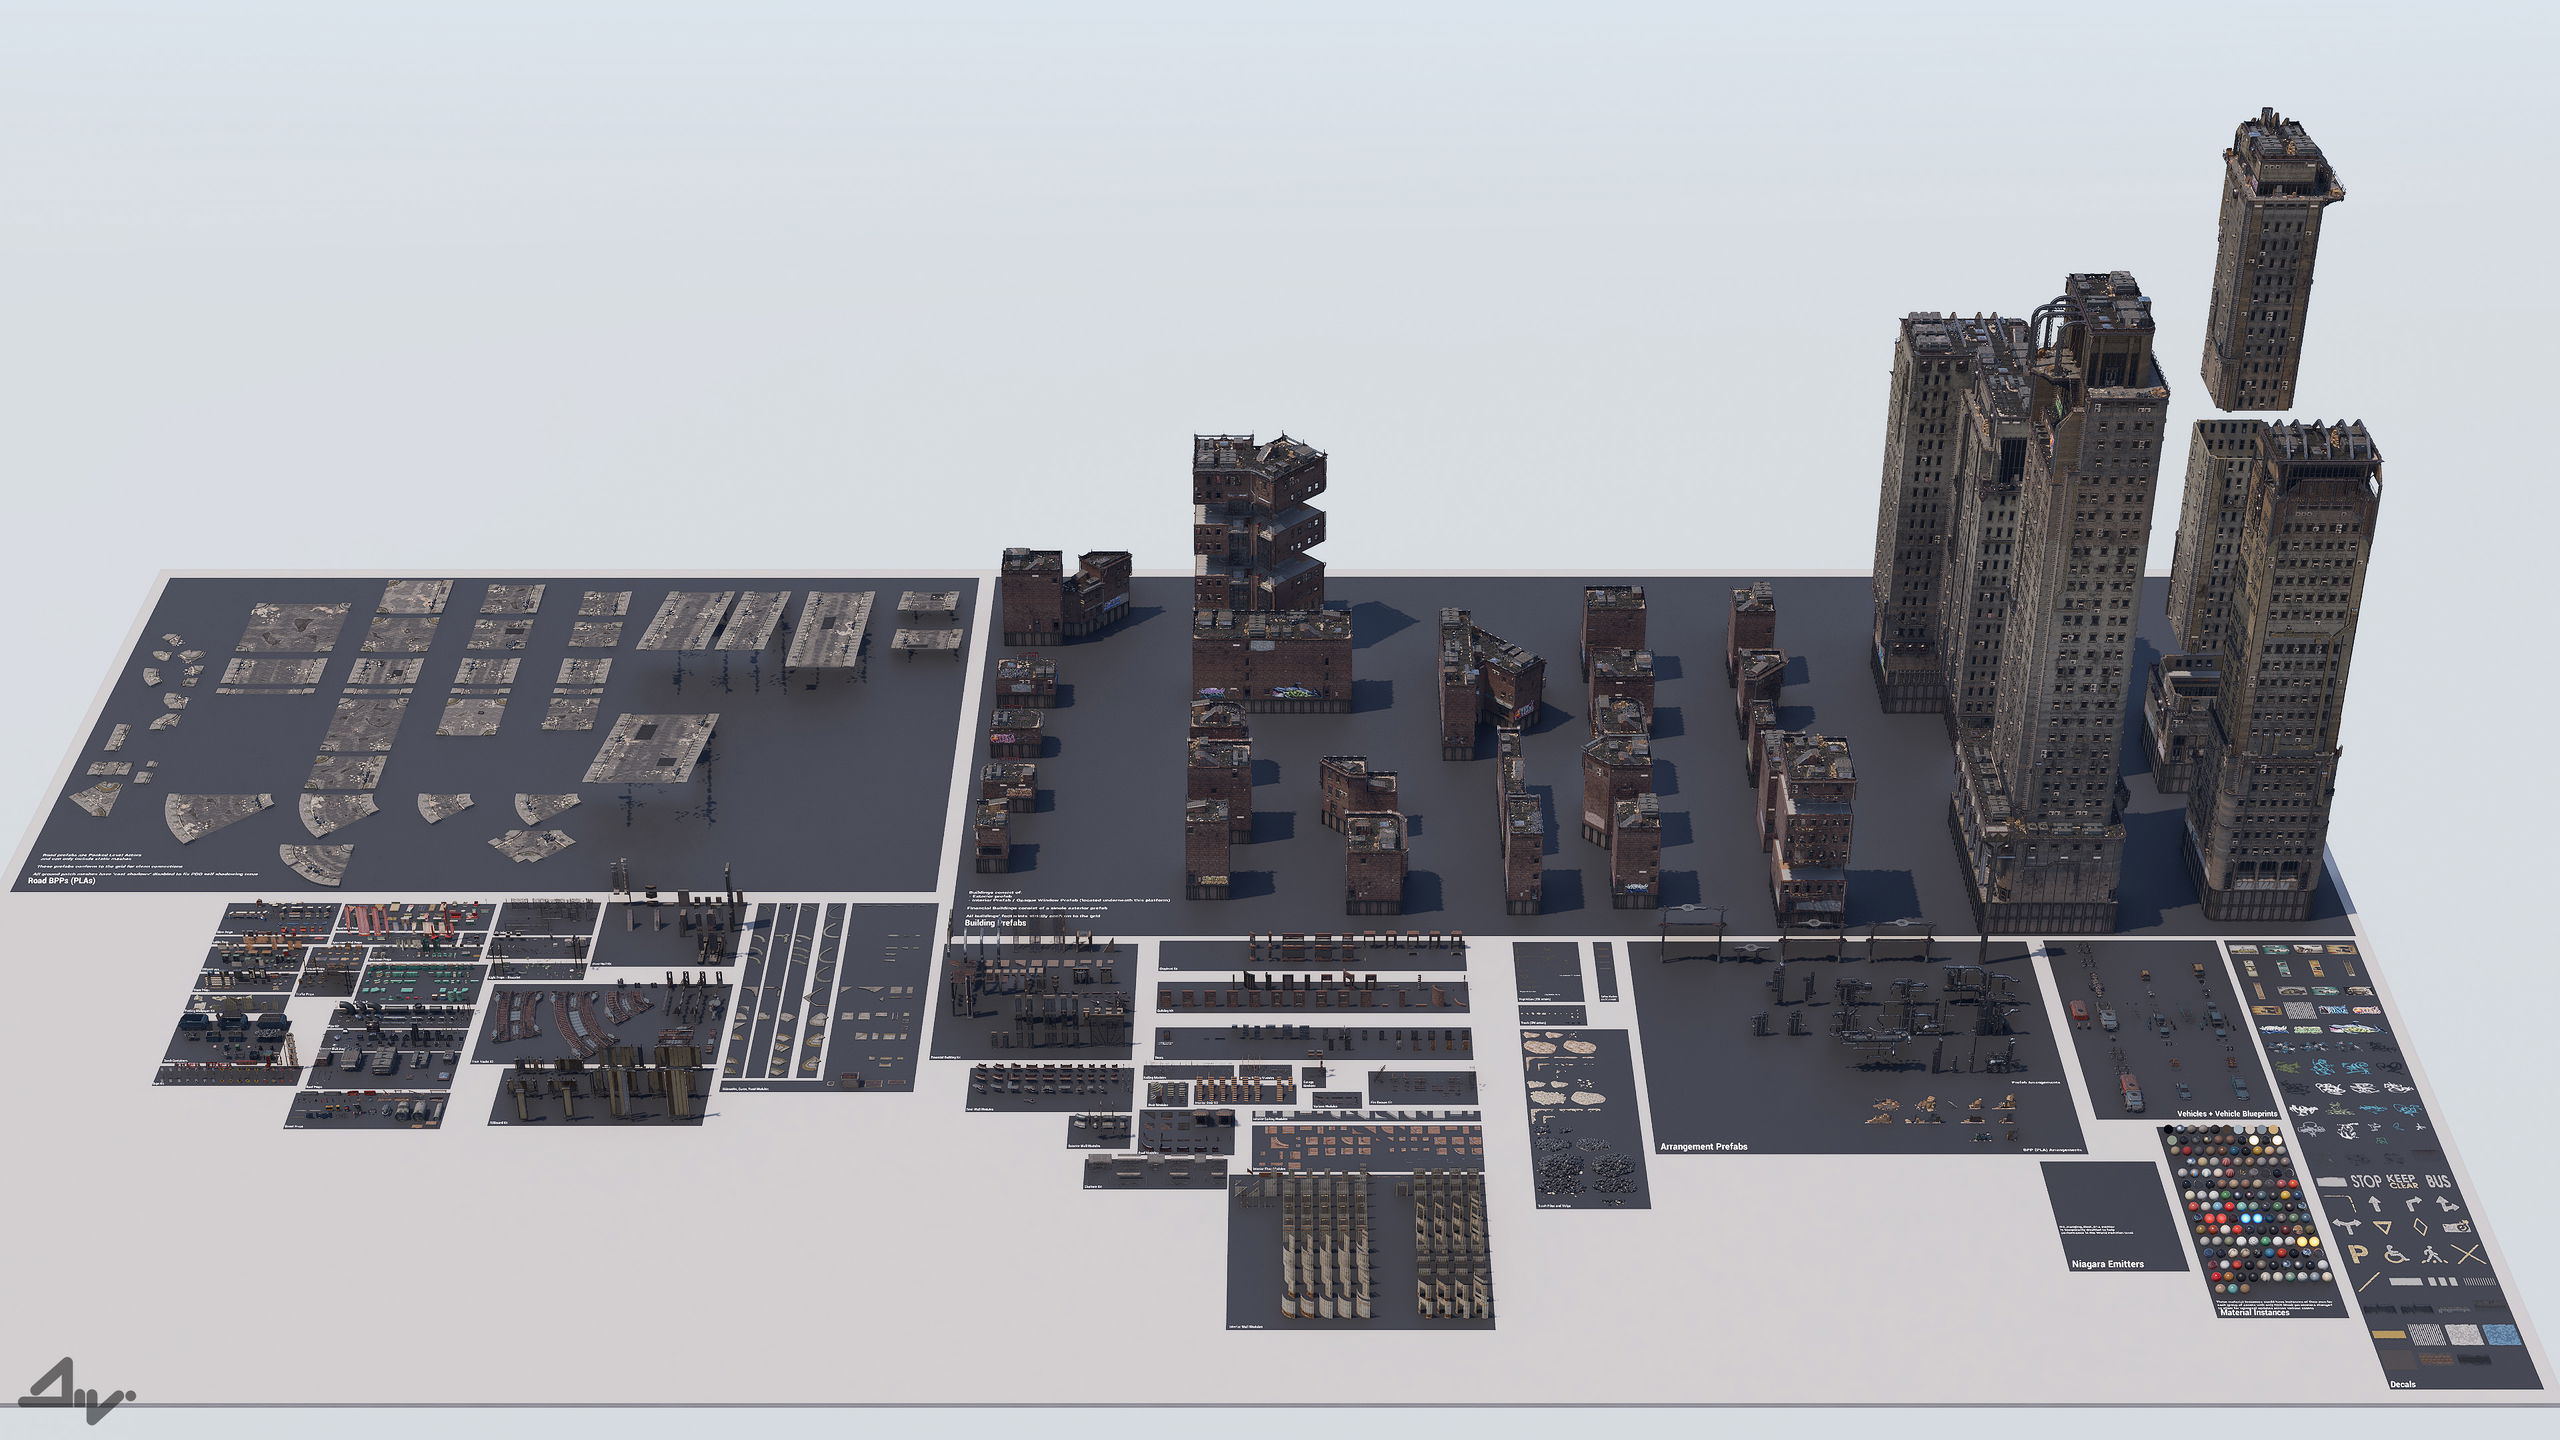
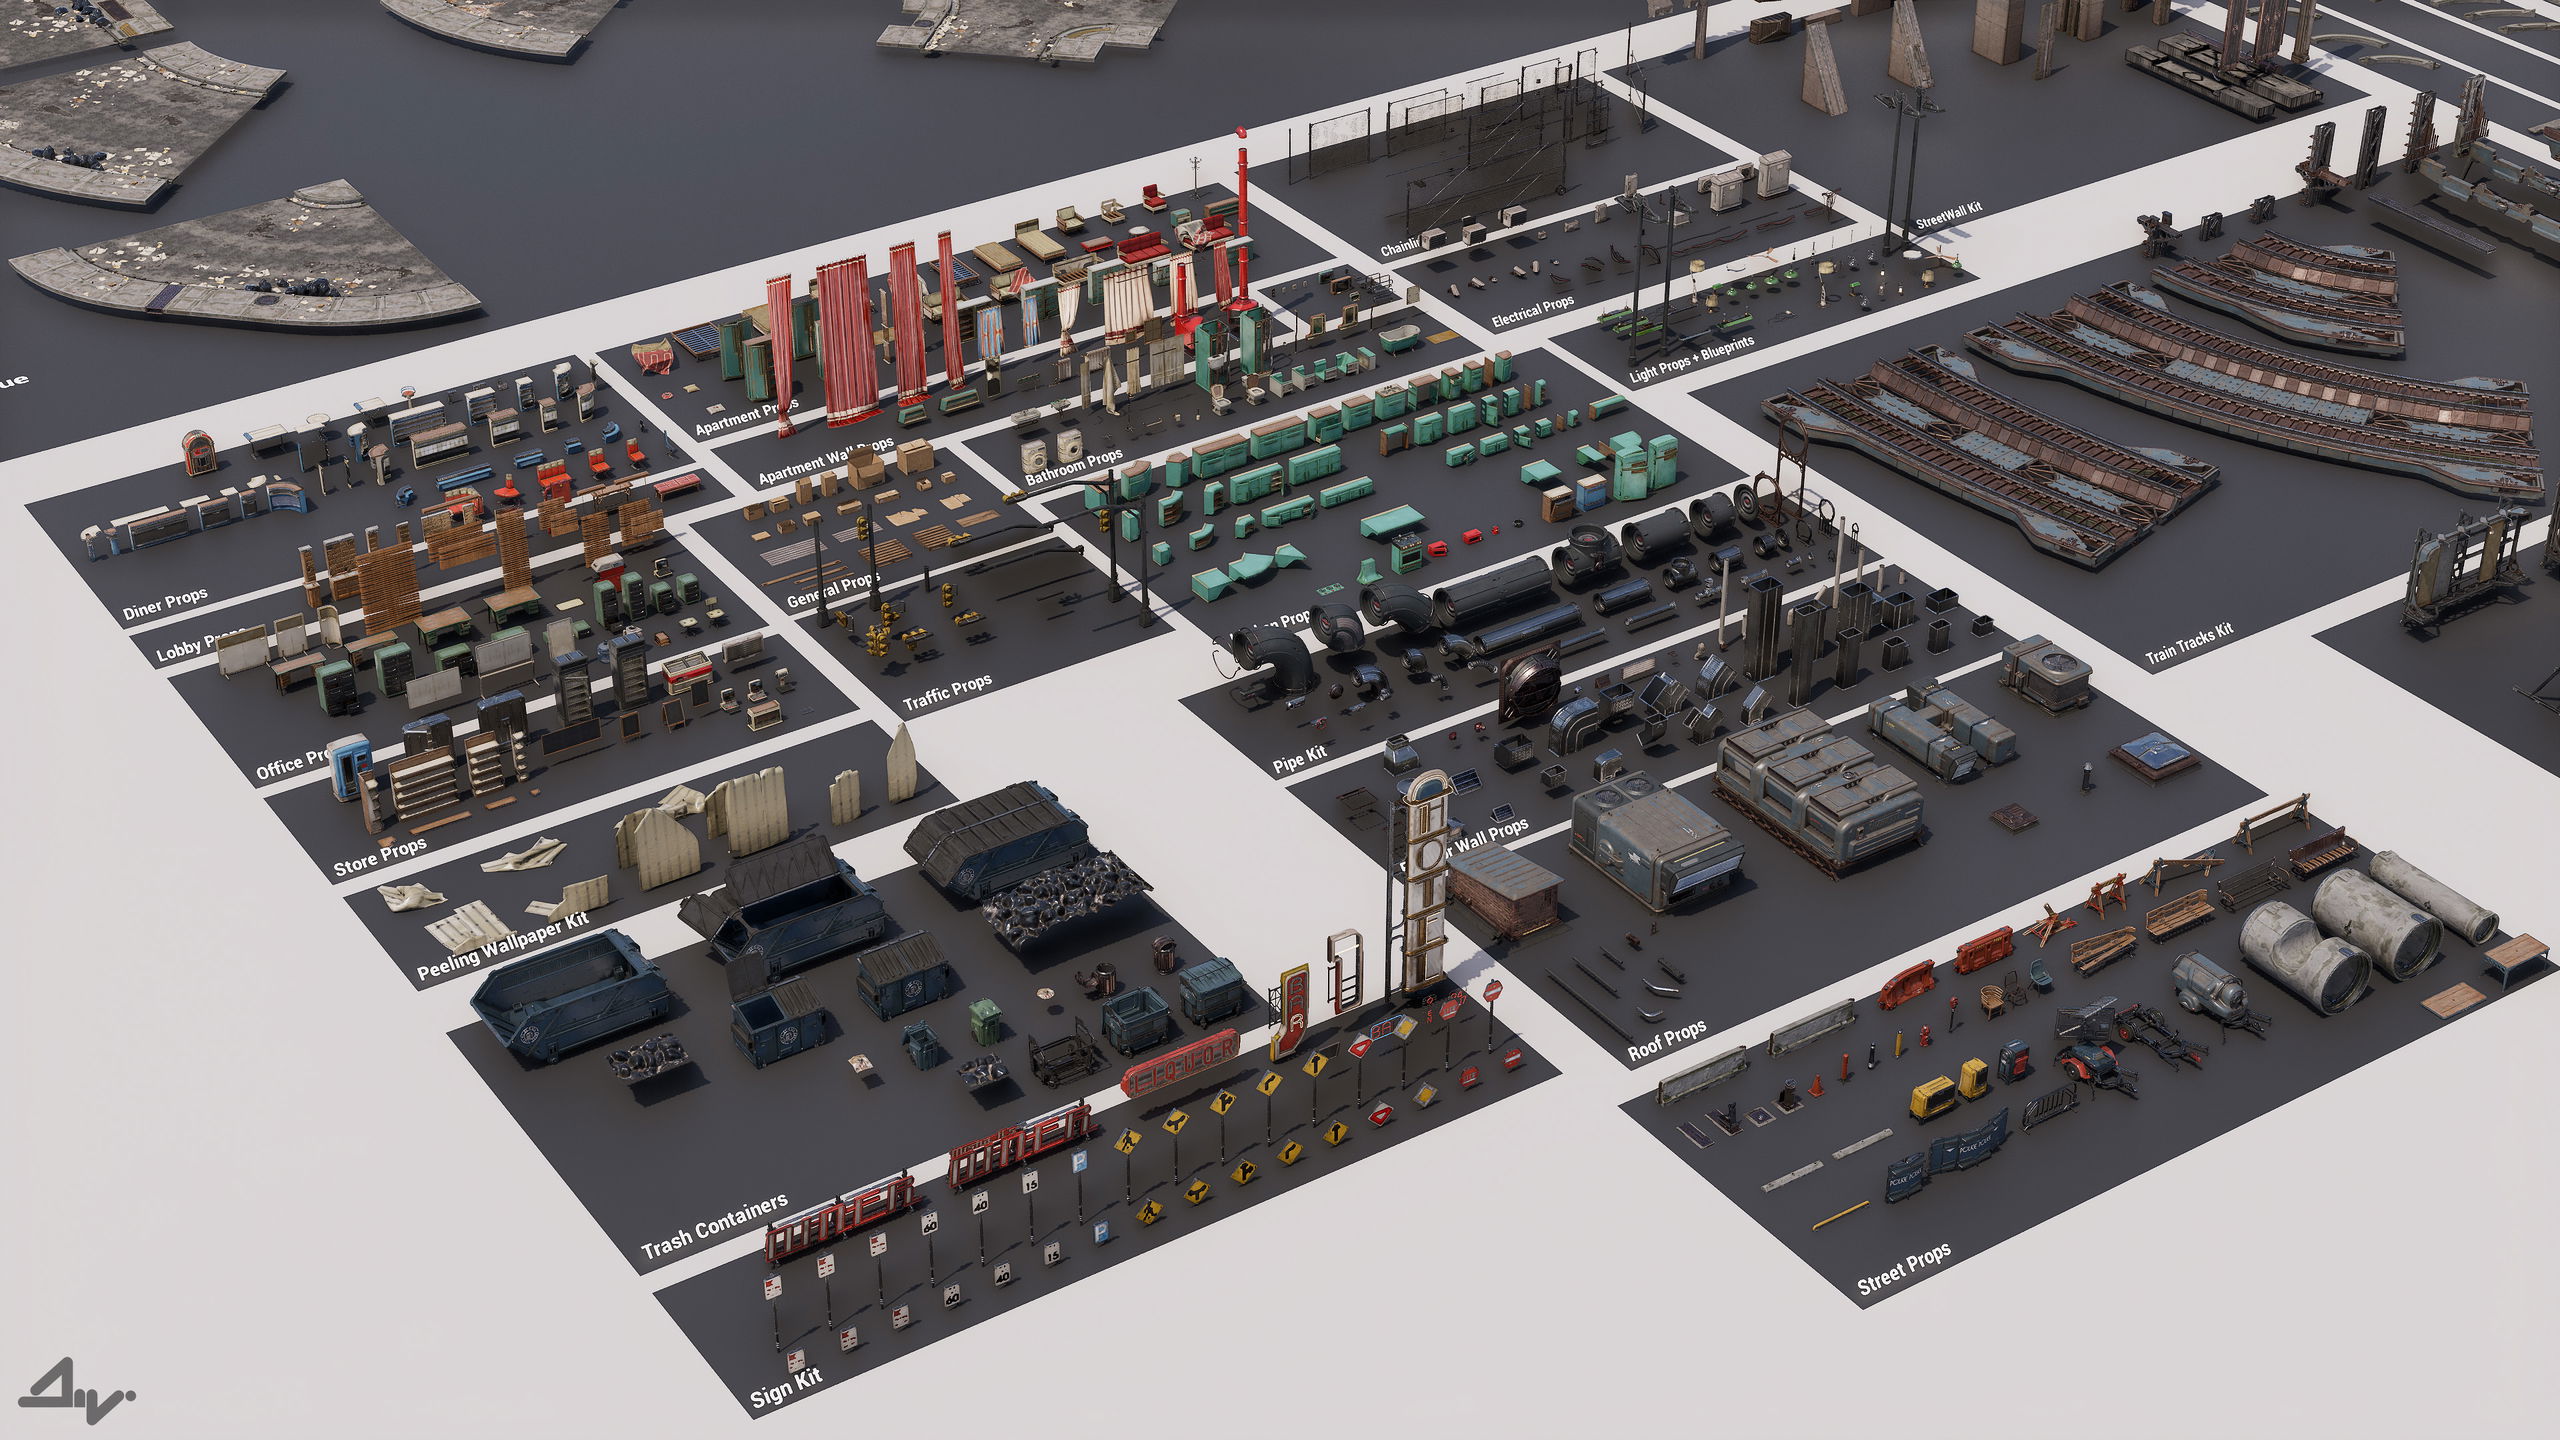
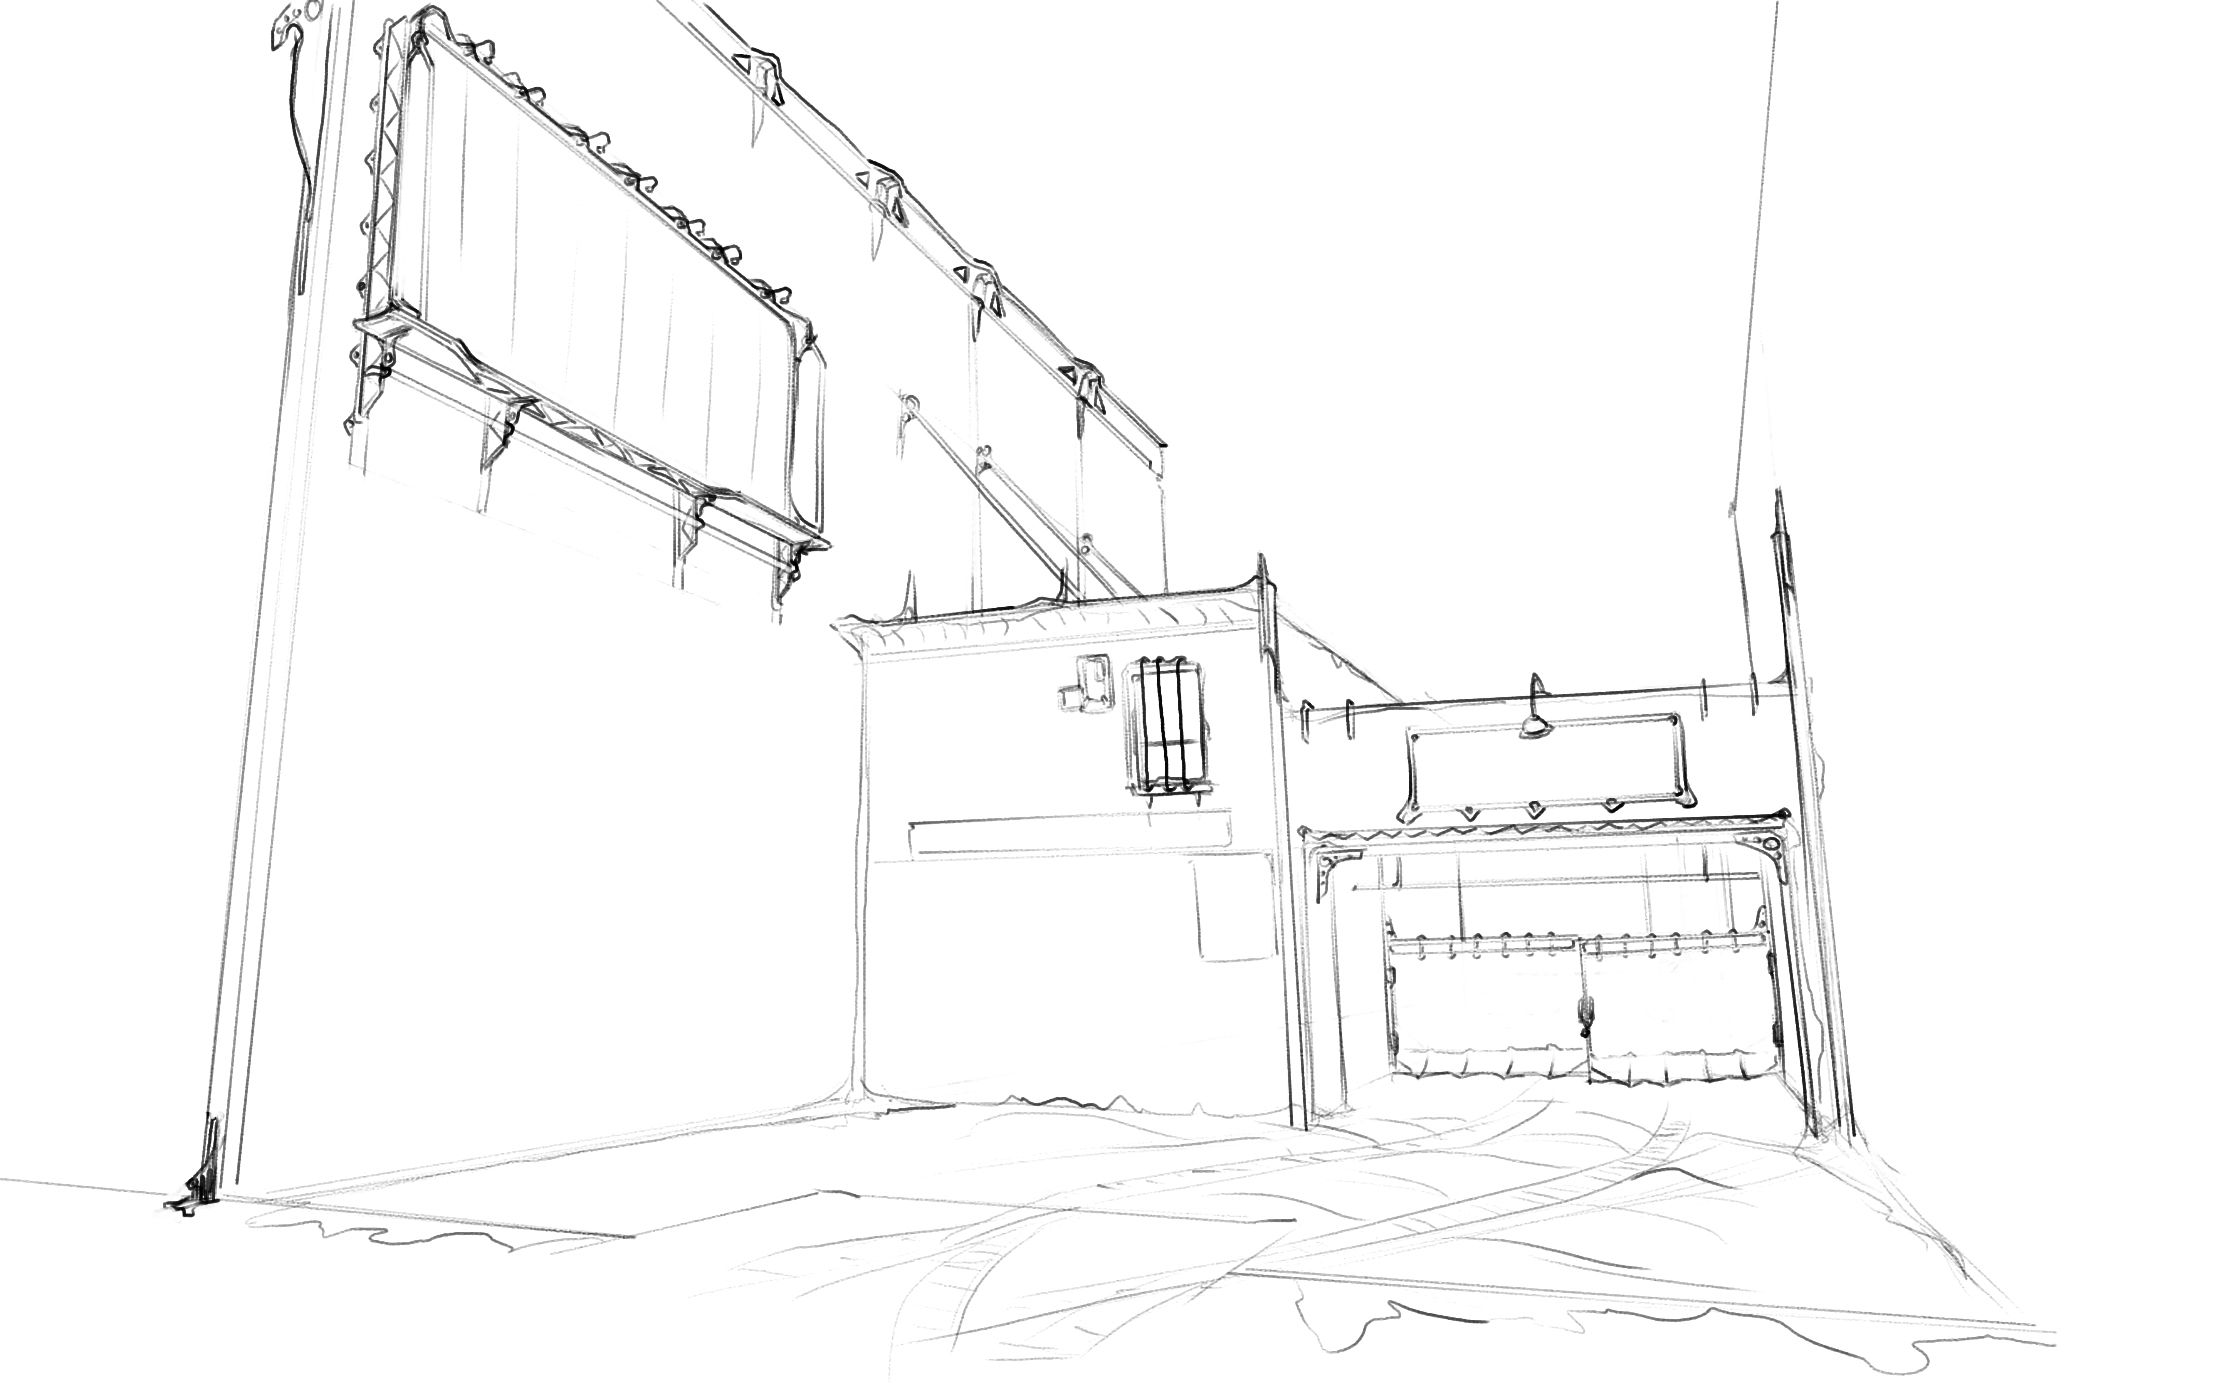
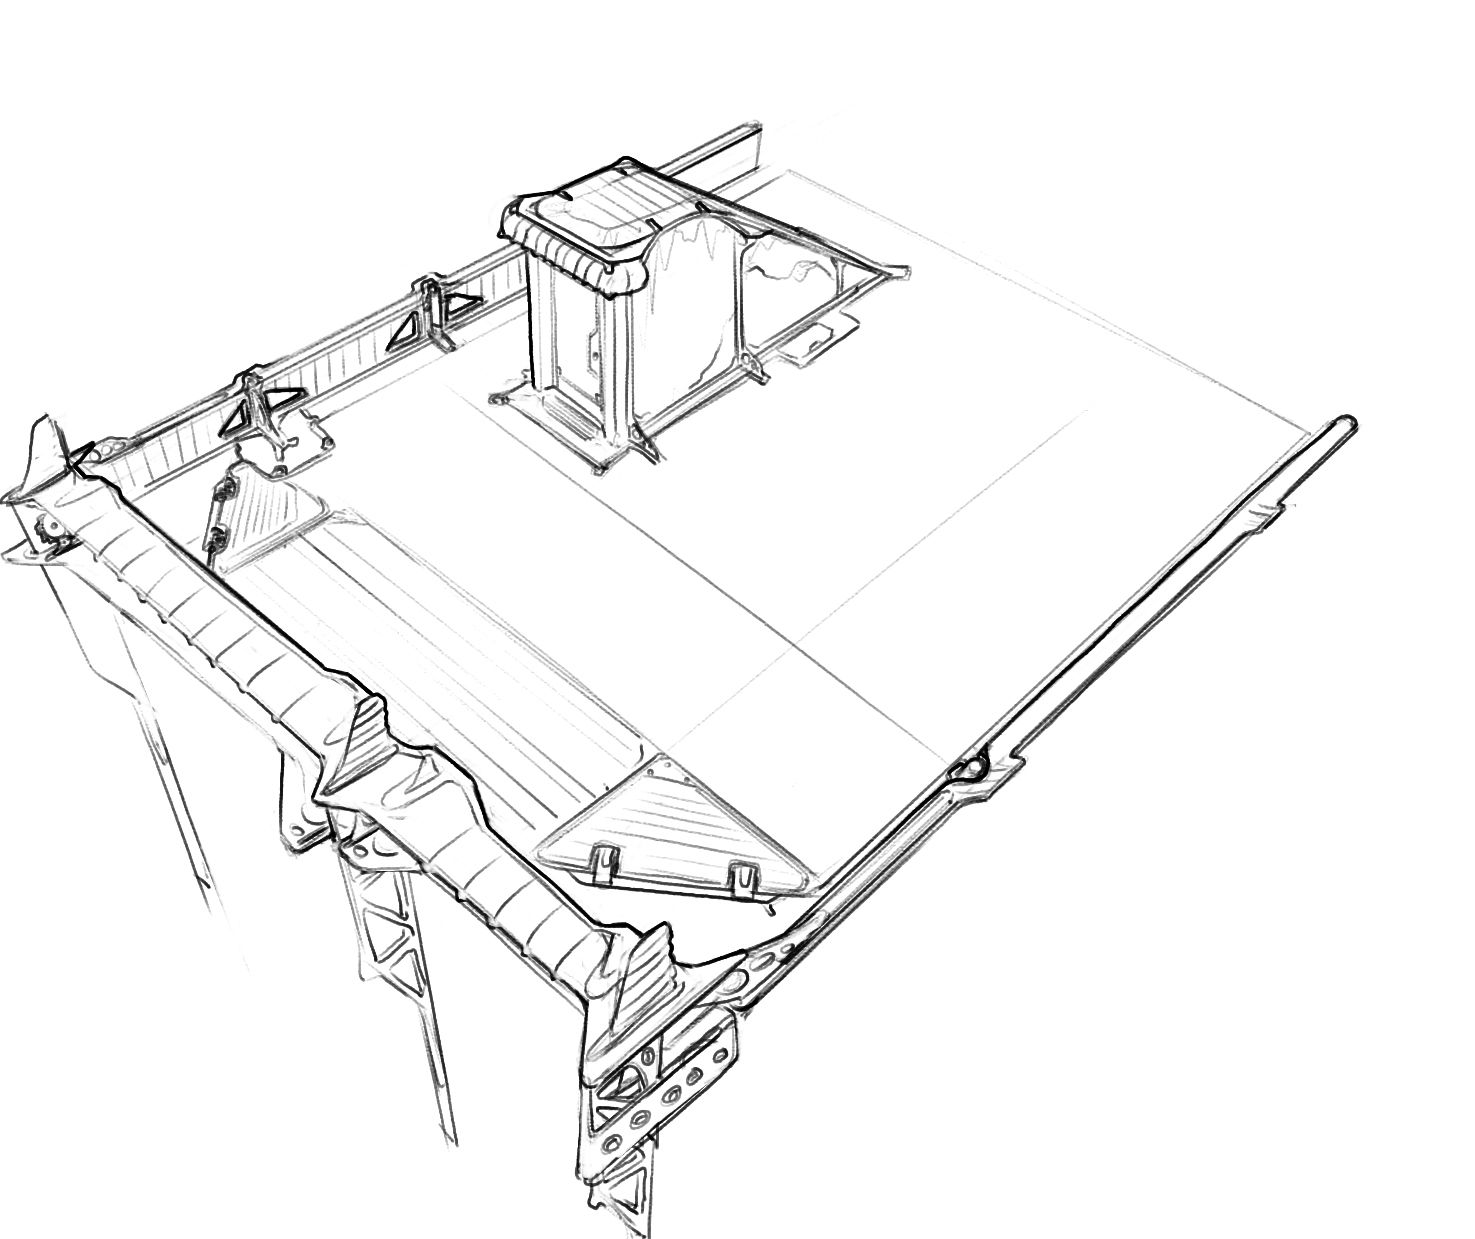
Modular buildings and road modules with strict metrics and adhesion to the grid would allow me to focus on quickly assembling large volumes of the cityscape without wasting time trying to align things.
The big downside with this approach is that oftentimes fully modular assemblies tend to produce blocky and stiff results so you have to account for that early and replace the main offenders with larger more natural looking modules for example.
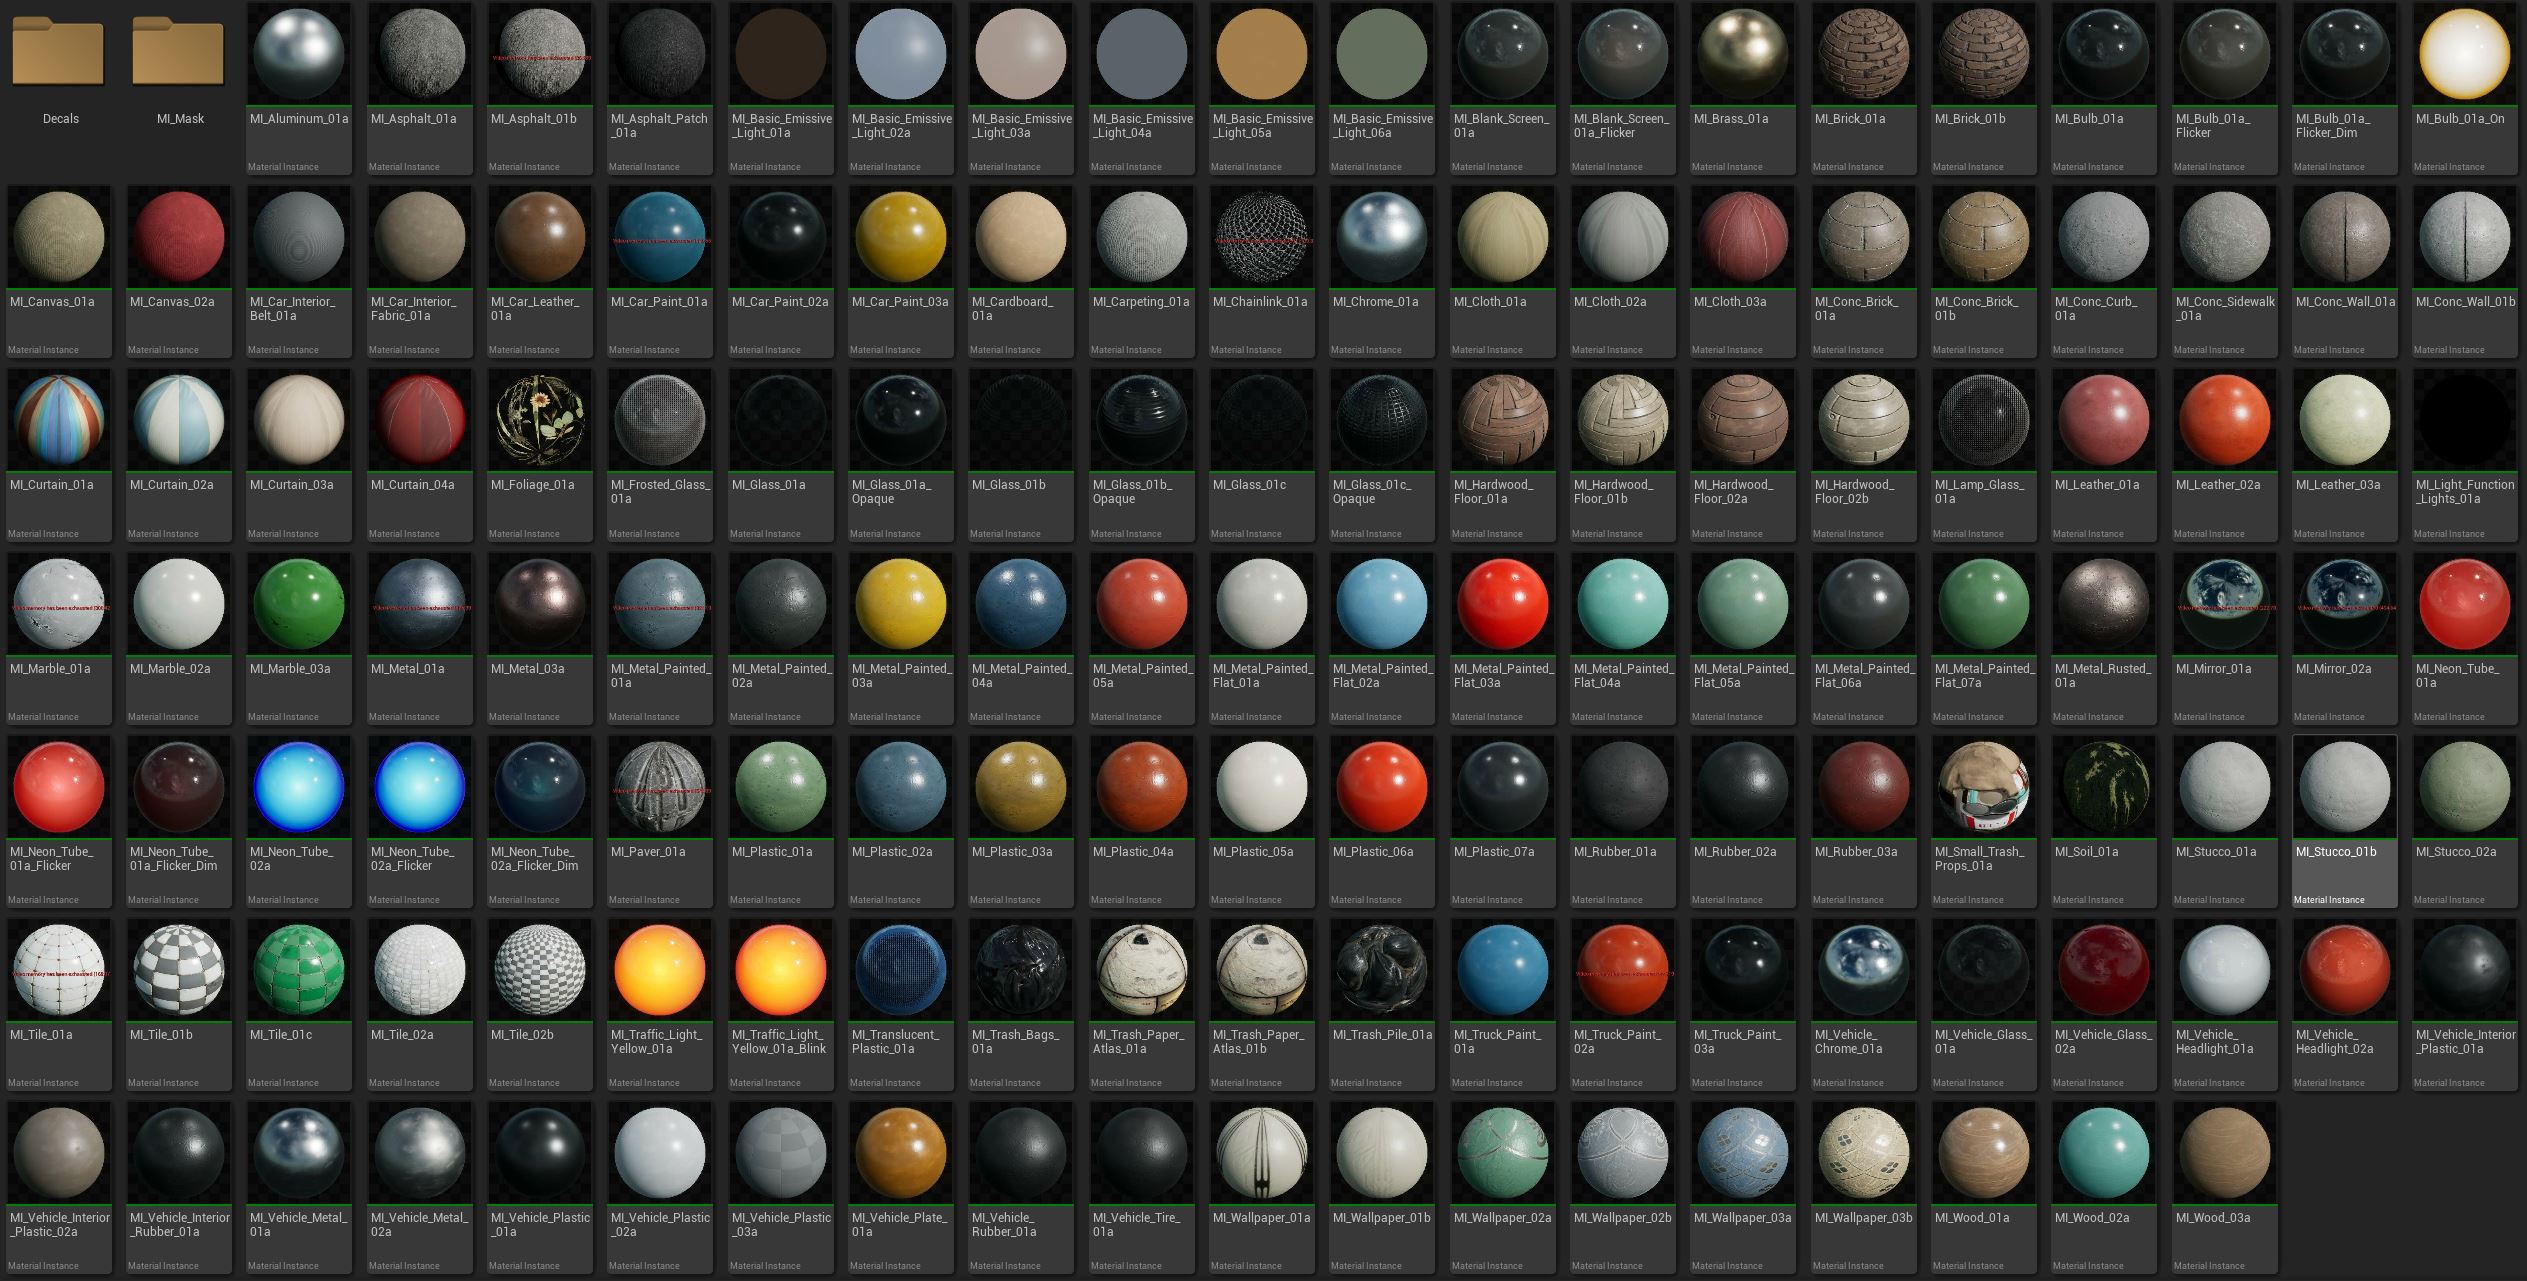
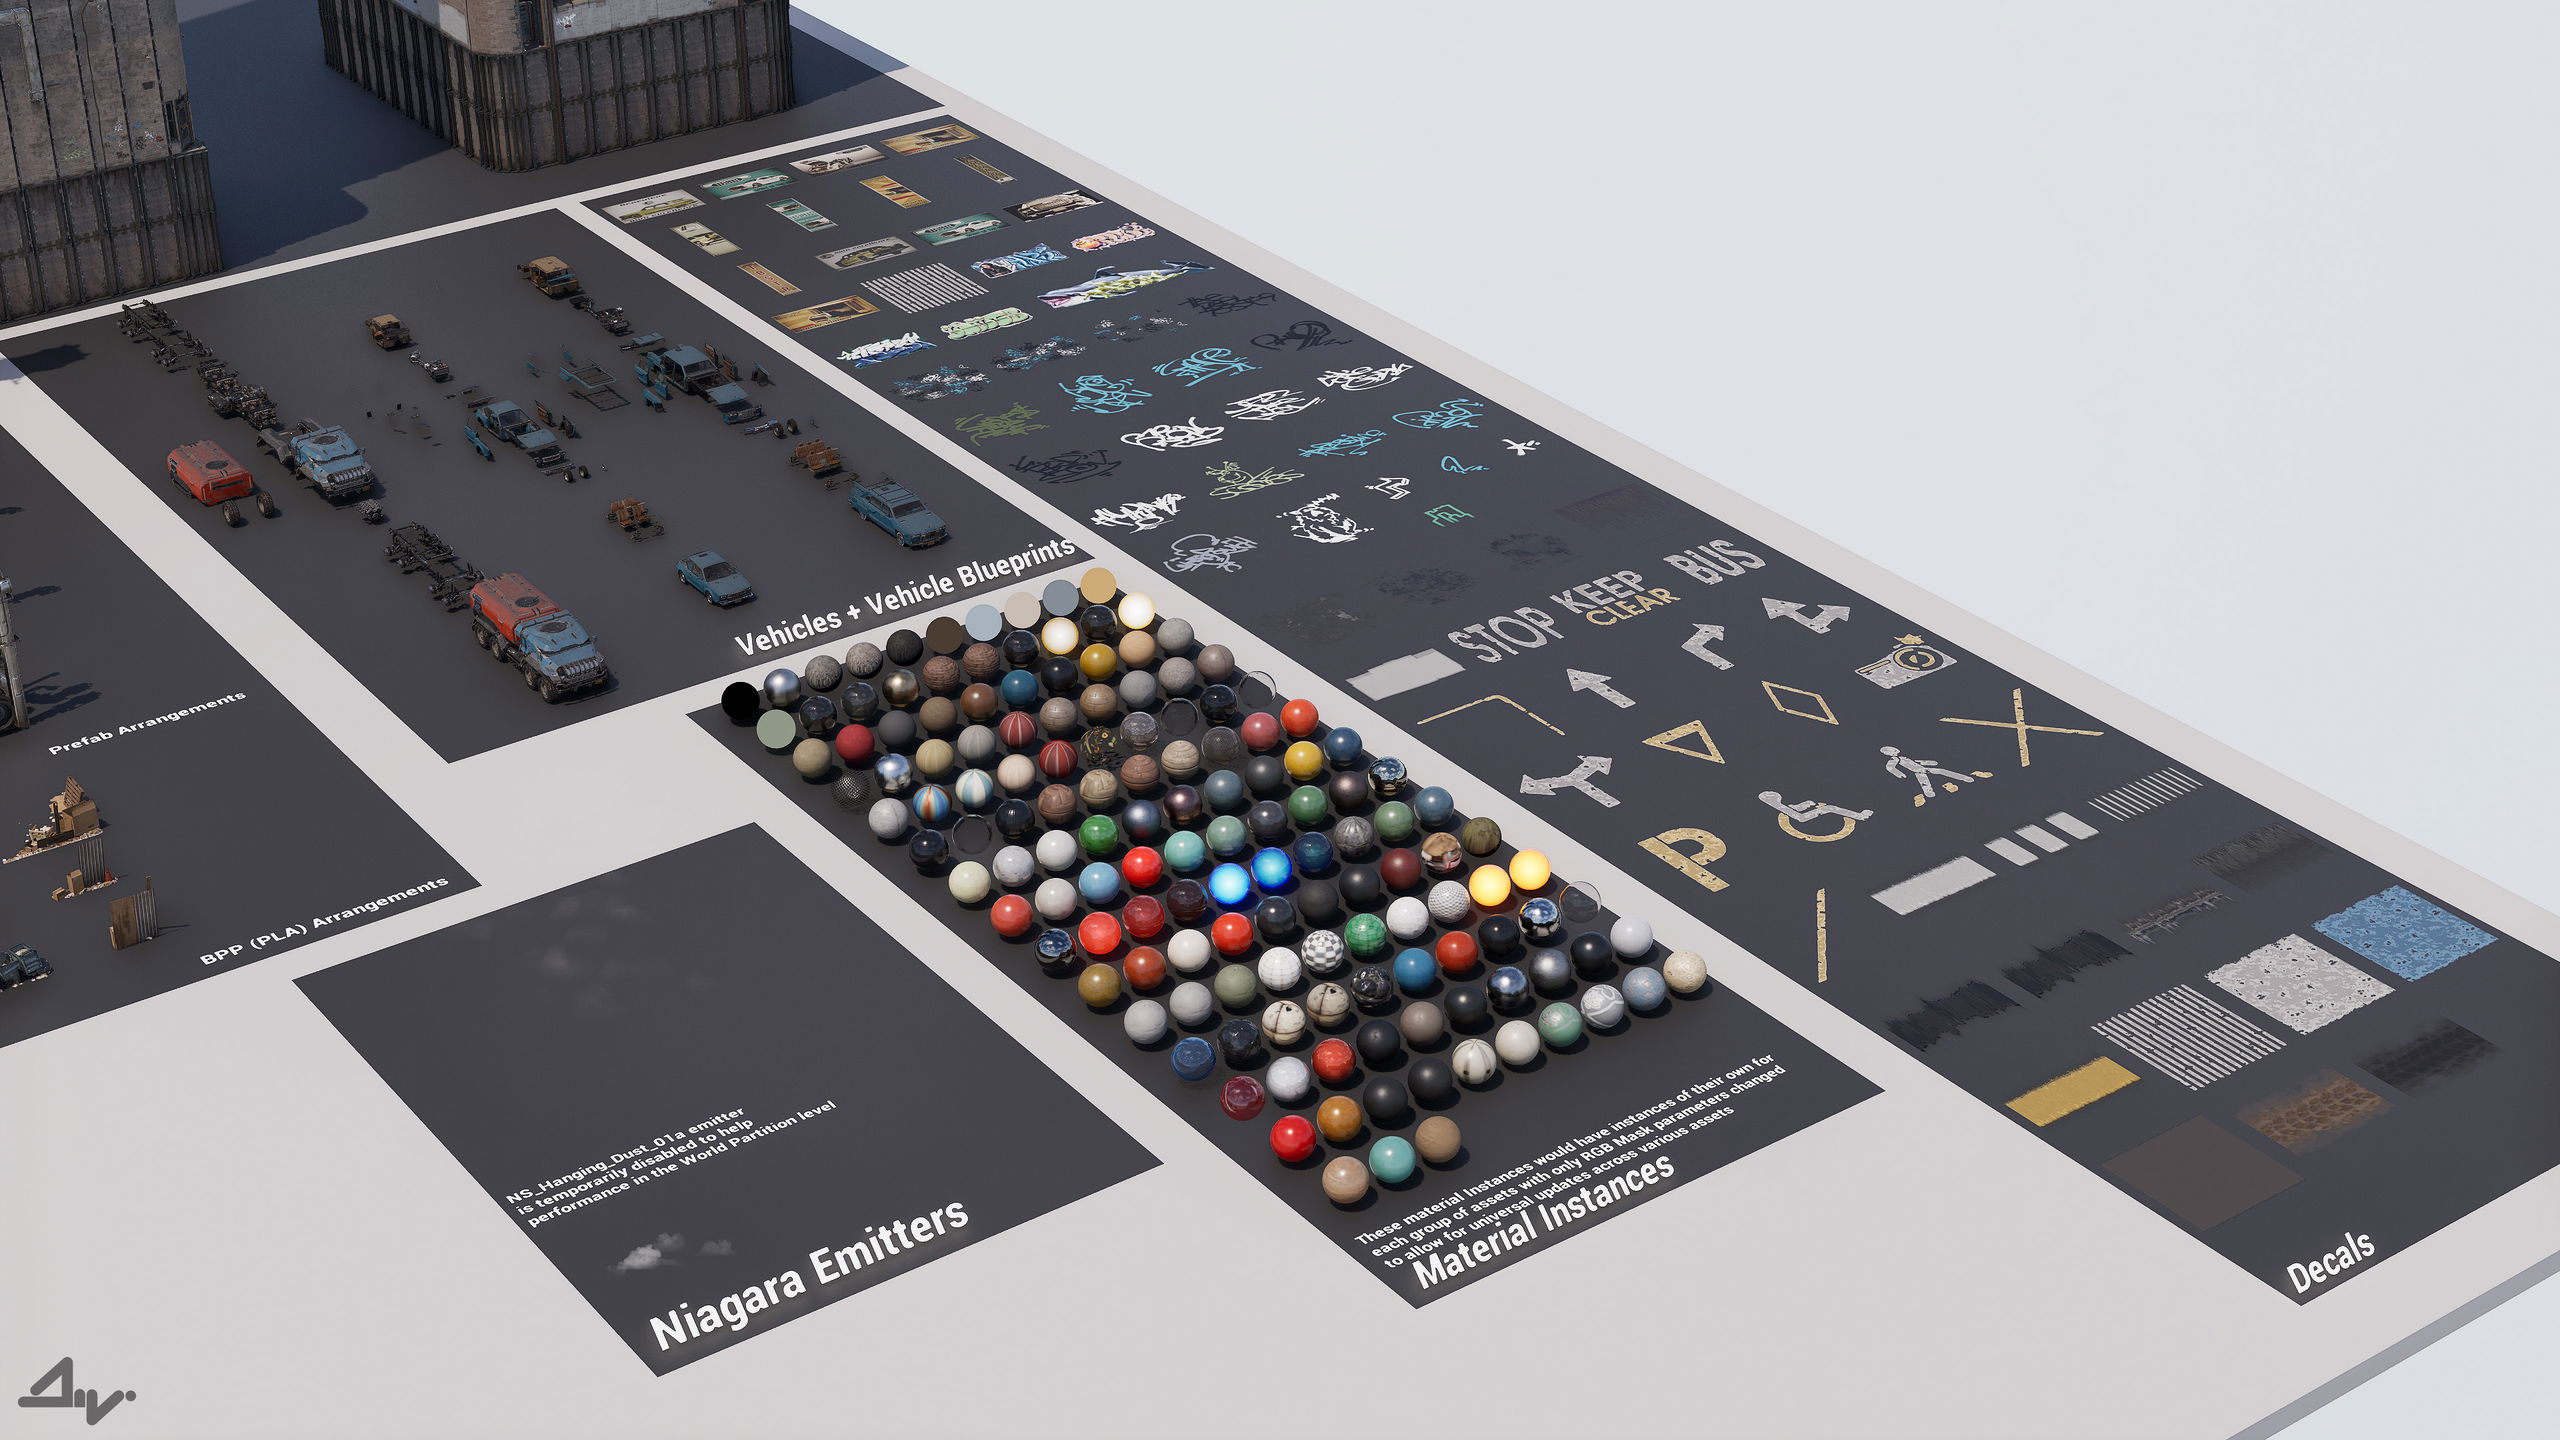
Another thing I decided on from the start was how texturing would be accomplished. With the amount of modules and props to come, I didn't want to have to tweak them individually, so a library of tileable materials would have to be introduced, that would be applied to all modules and props in the project.
At first however a collection of basic colored materials was enough.
I knew that just tiles wouldn't cut it, so vertex paint for certain types of materials was introduced.
Another thing to help accentuate geometric details was an RGB mask that would be baked for any given asset or a group of assets via the 2nd UV channel and then applied on top of the tiles to bring out edges, fill in concave areas and help break up monotomy with spots and color gradations all for a spoke and detailed result.
As Nanite was just introduced to Unreal Engine, I was curious how powerful this new tool really is.
Considering I wouldn't have time to create low poly geometry and the goal was to have as much geometric detail as possible anyway, I figured that all new assets that were to be introduced would have only their actual geometry to support all the details.
No baked normal maps, just raw vertices and eventually mesh decals.
With that being said, I needed to keep the details and bevel sizes consistent across the entire asset library, so I settled on a unified width for bevels; I'd reuse small objects like bolts, handles, rivets etc; and I'd have a 3D character in my 3ds Max scene close to the kit that I was currently modeling at all times to keep proportions consistent too.

Hiccups
These key points helped smooth out production by a lot, but it still wasn't without trouble. Despite working on game projects with open city maps before (and that definitely helped picture the entire environment better and gave me answers beforehand to questions I would inevitably get stuck on at some point) I was still approaching something of this scale solo for the first time in my life.
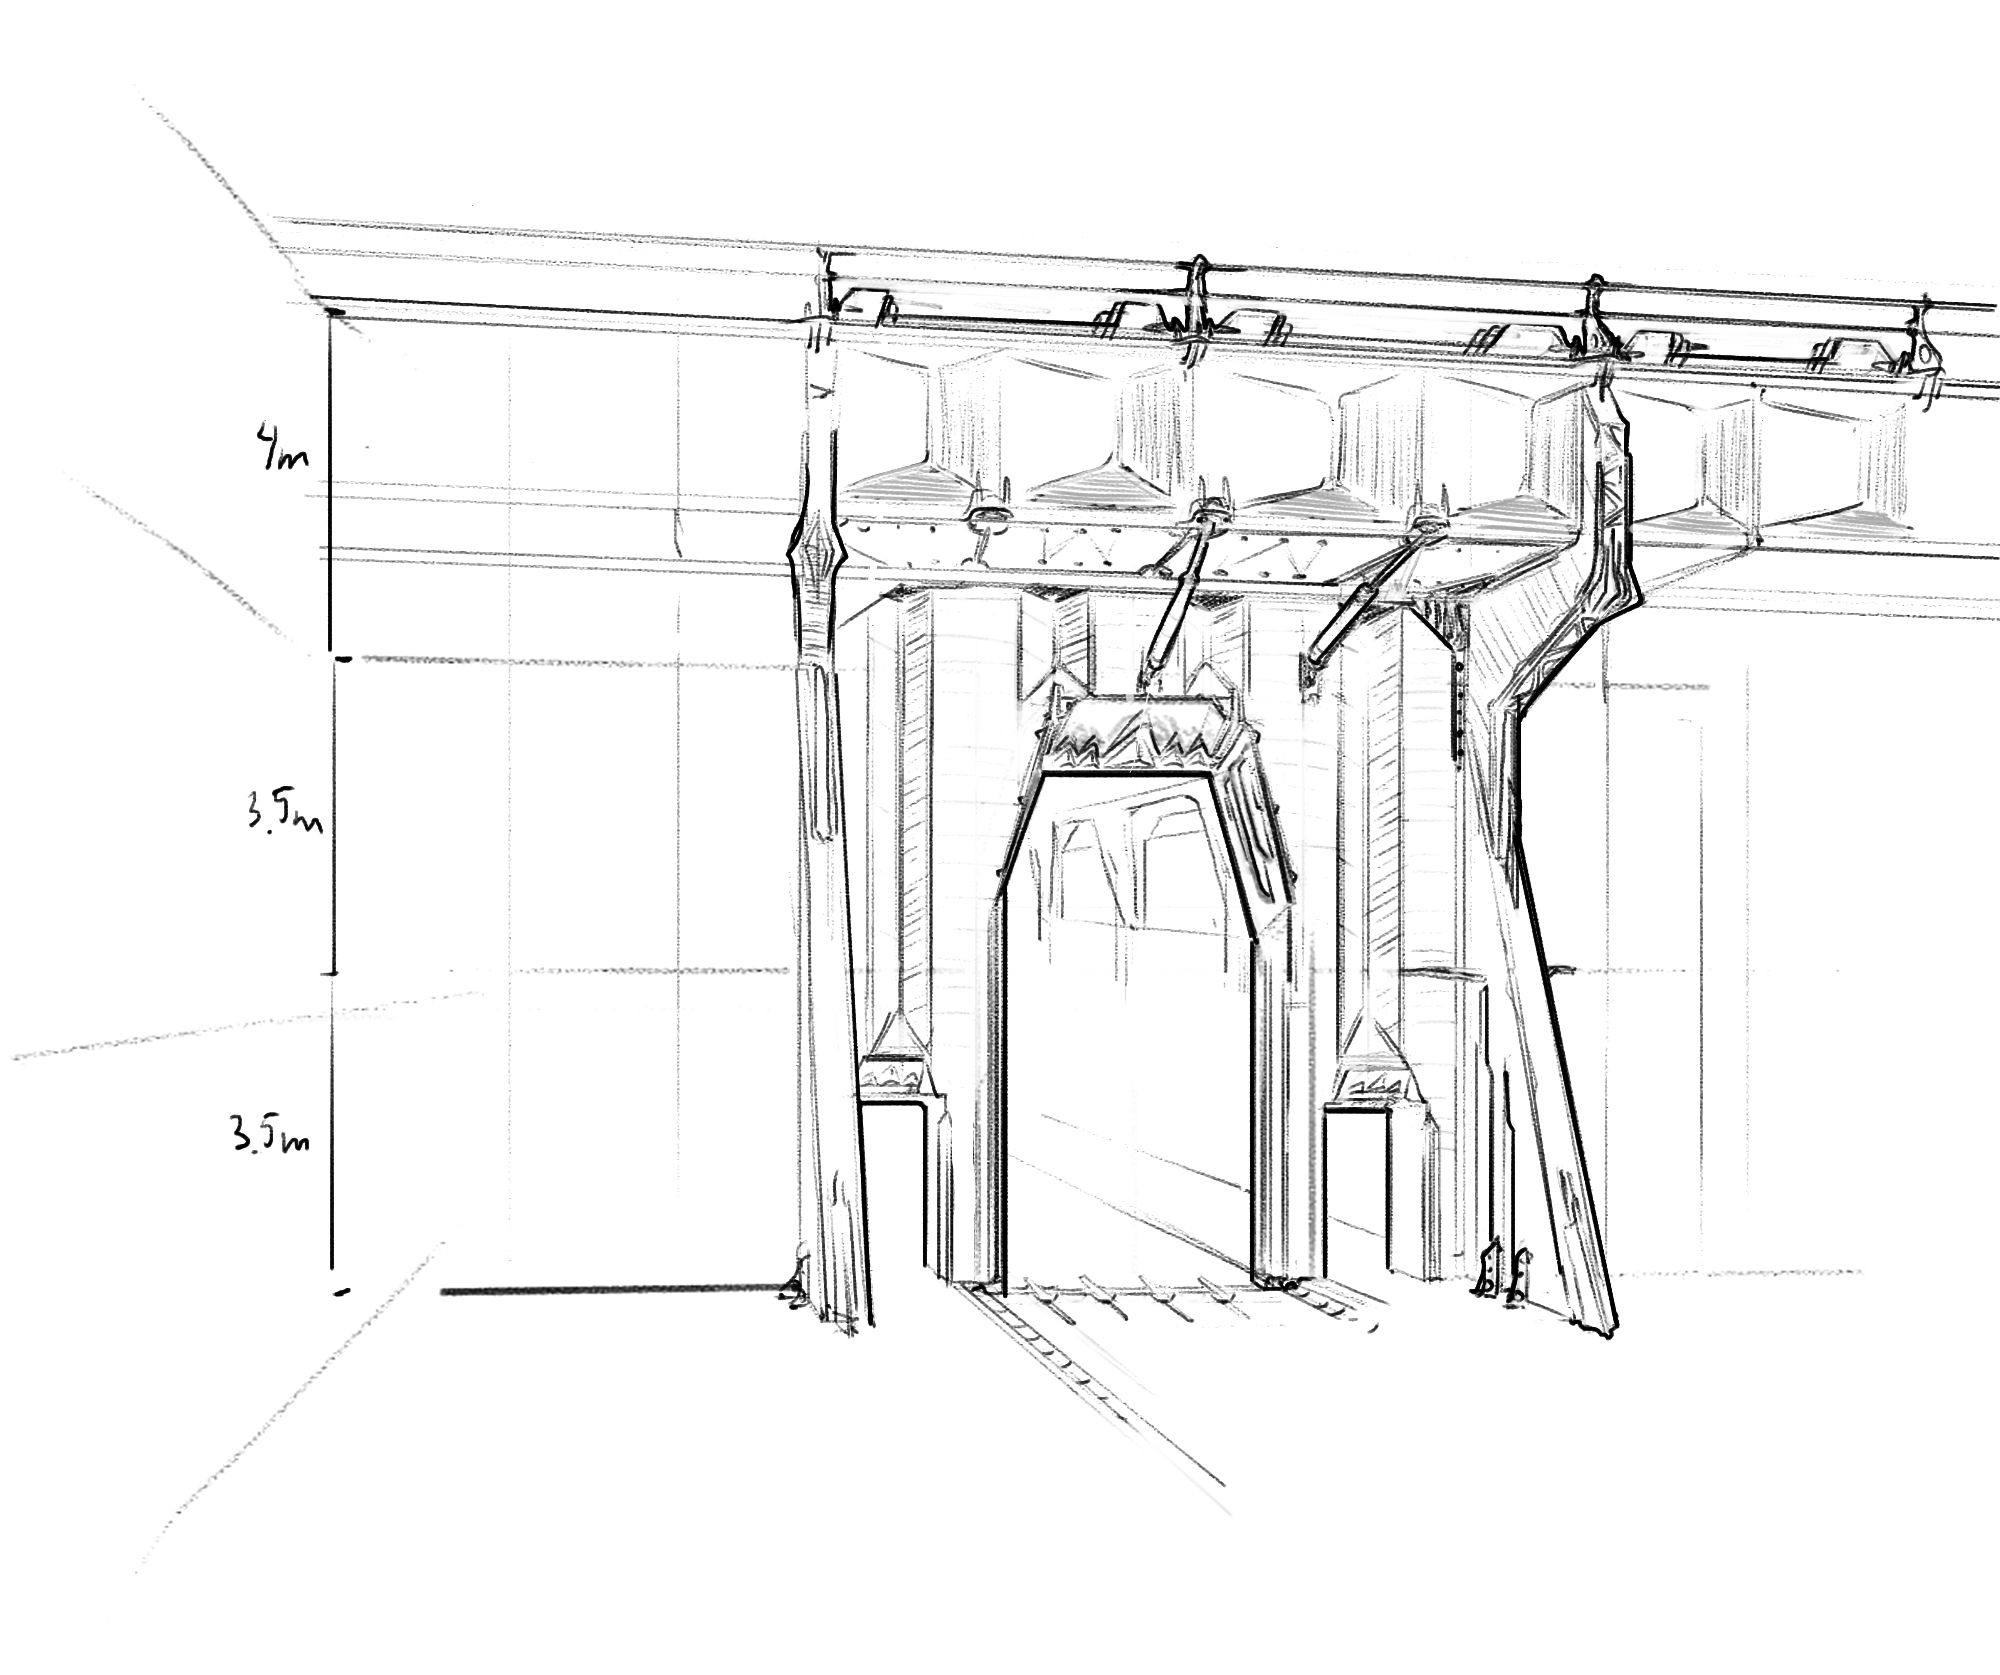
Without starting from a foundation that you'd normally get from a level designer, I realized at one point that my ceiling height is too low, the roads are turning out to be too narrow to realistically be used as such or to accomodate cars being parked on the sides without blocking potential traffic.
So as I raised the walls and widened the roads along with moving buildings out of the way across what was already a couple dozen of blocks, I realized just how deep of a swamp I really walked into.
Vision and Pipeline
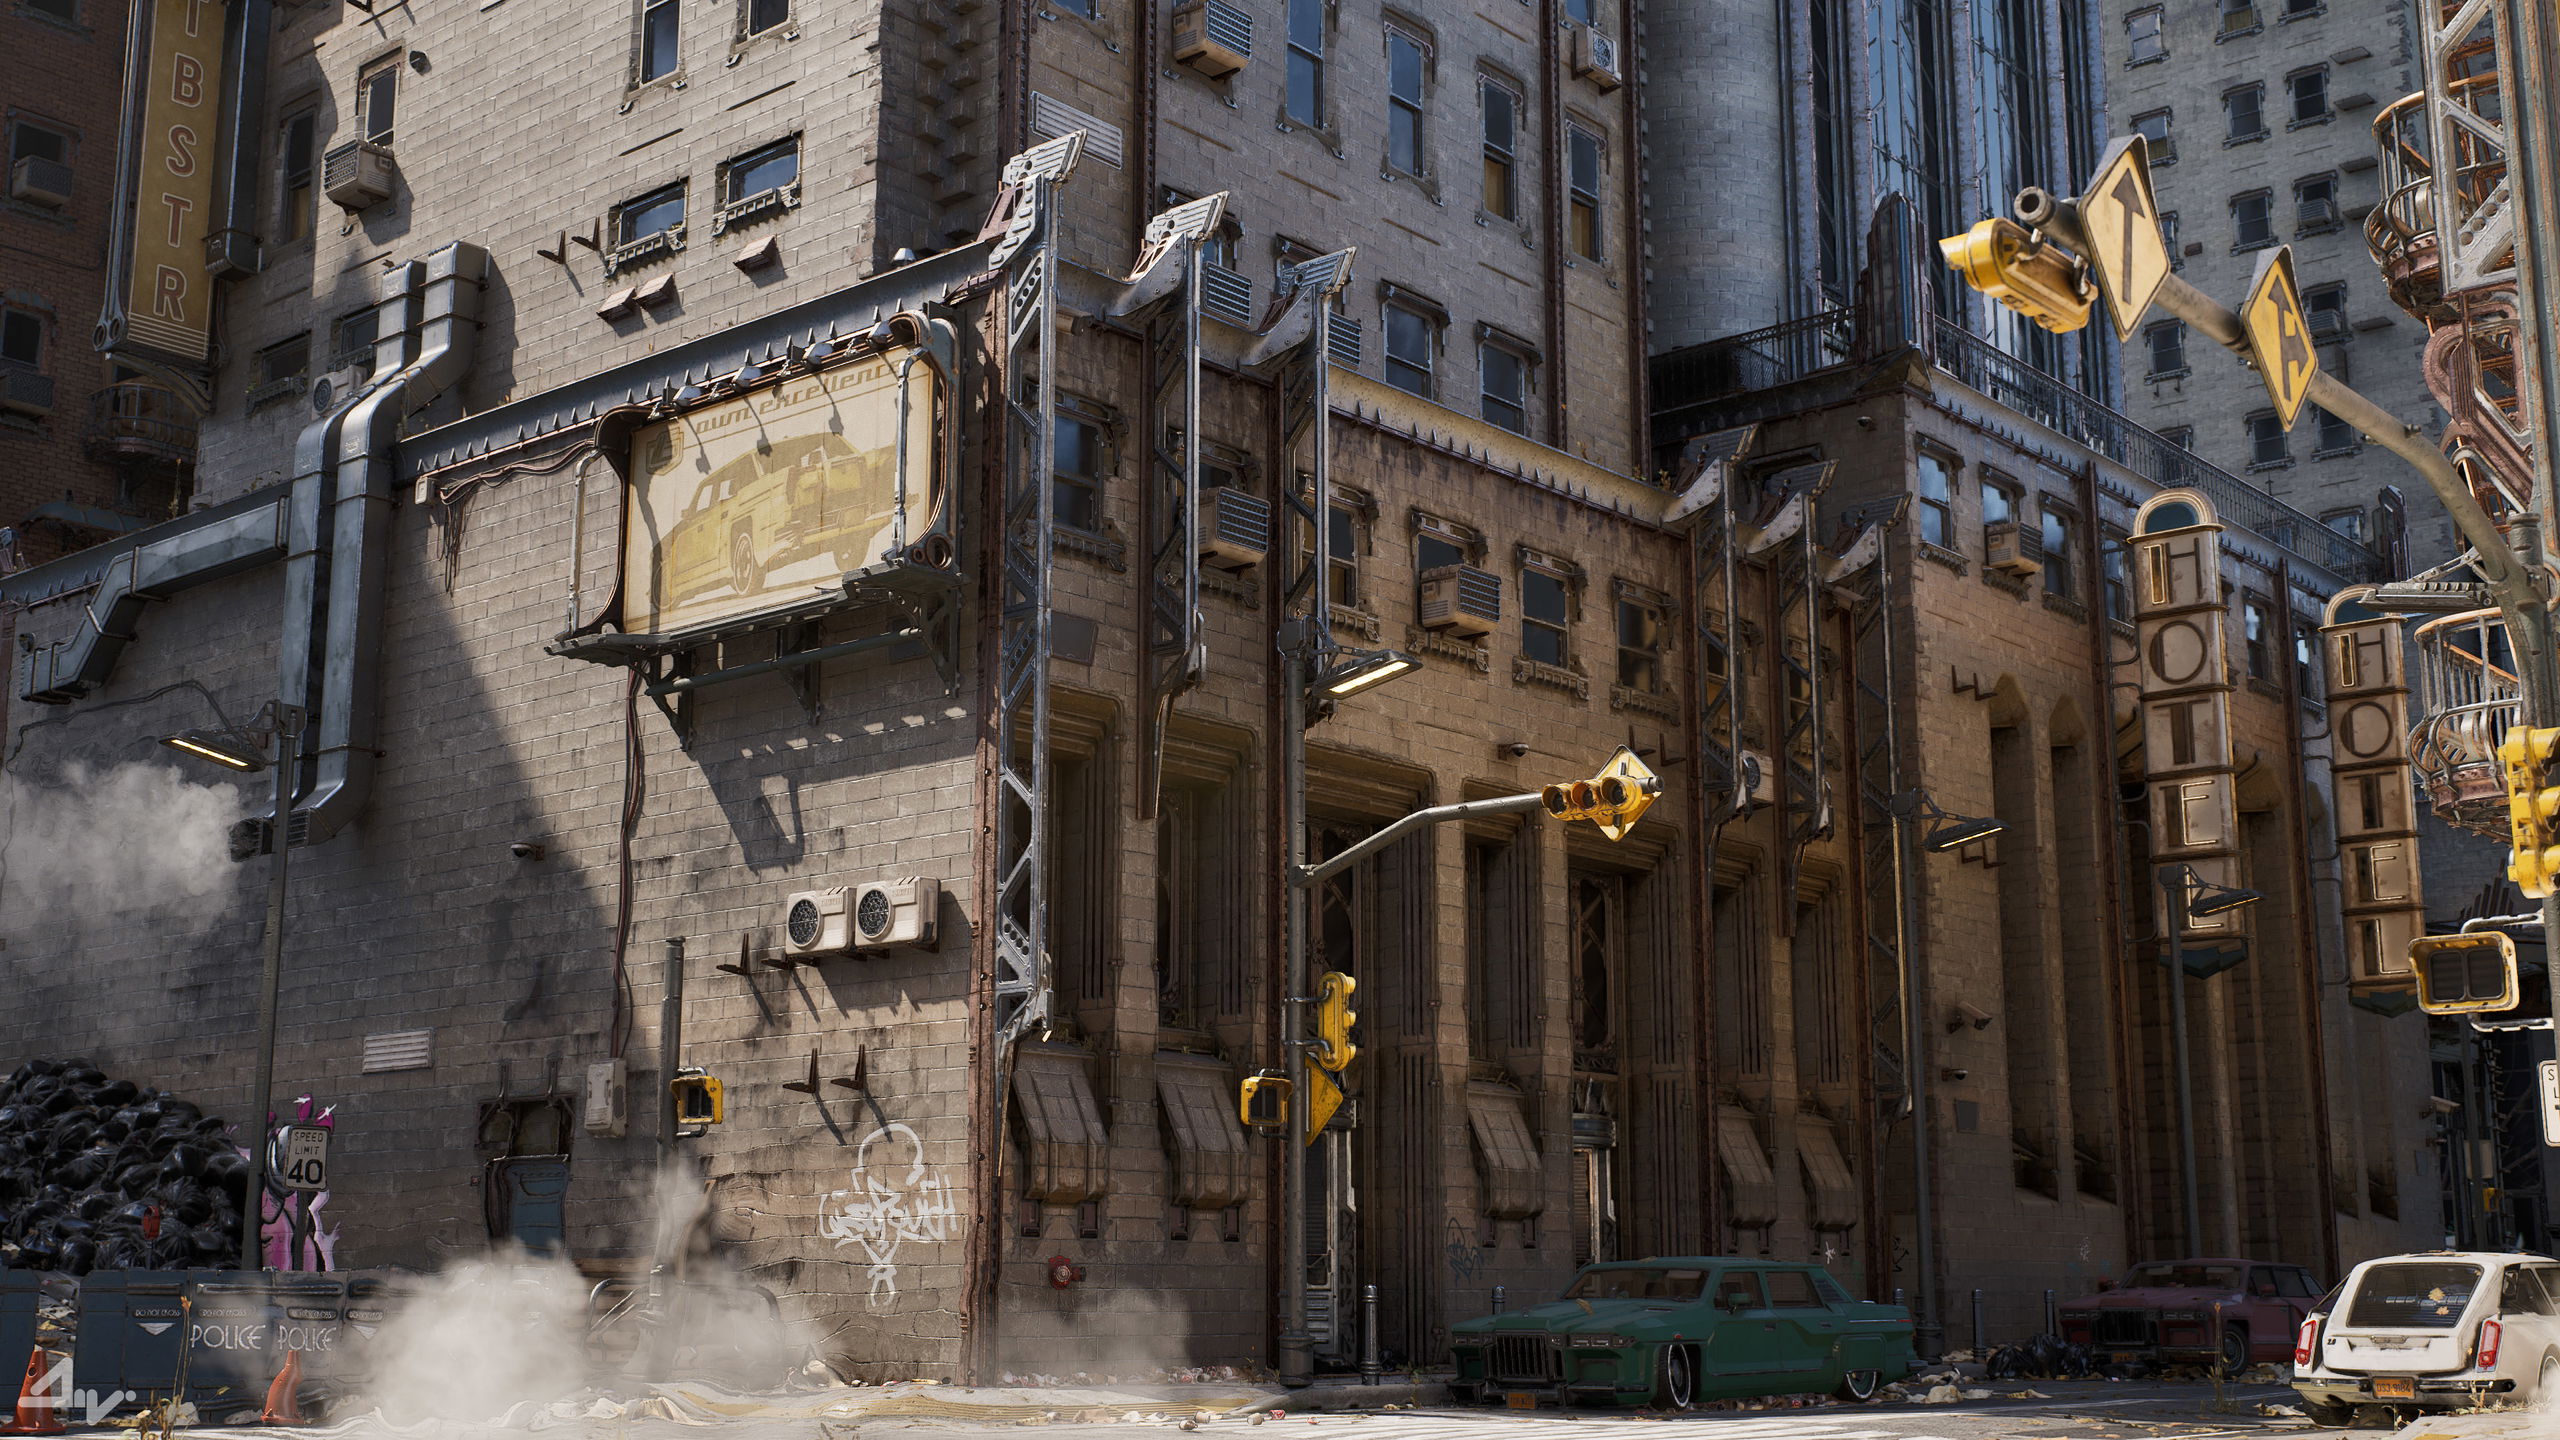
Luckily, I had a good job at the time which allowed me to take my time with this piece. With the critical issues solved, for a while it was just modeling building kits, propagating them, seeing how they marry with other kits, then moving on to the first large props etc.
Essentially the approach was to go from large to small, check what other crucial element is still missing and narrowing the list further.
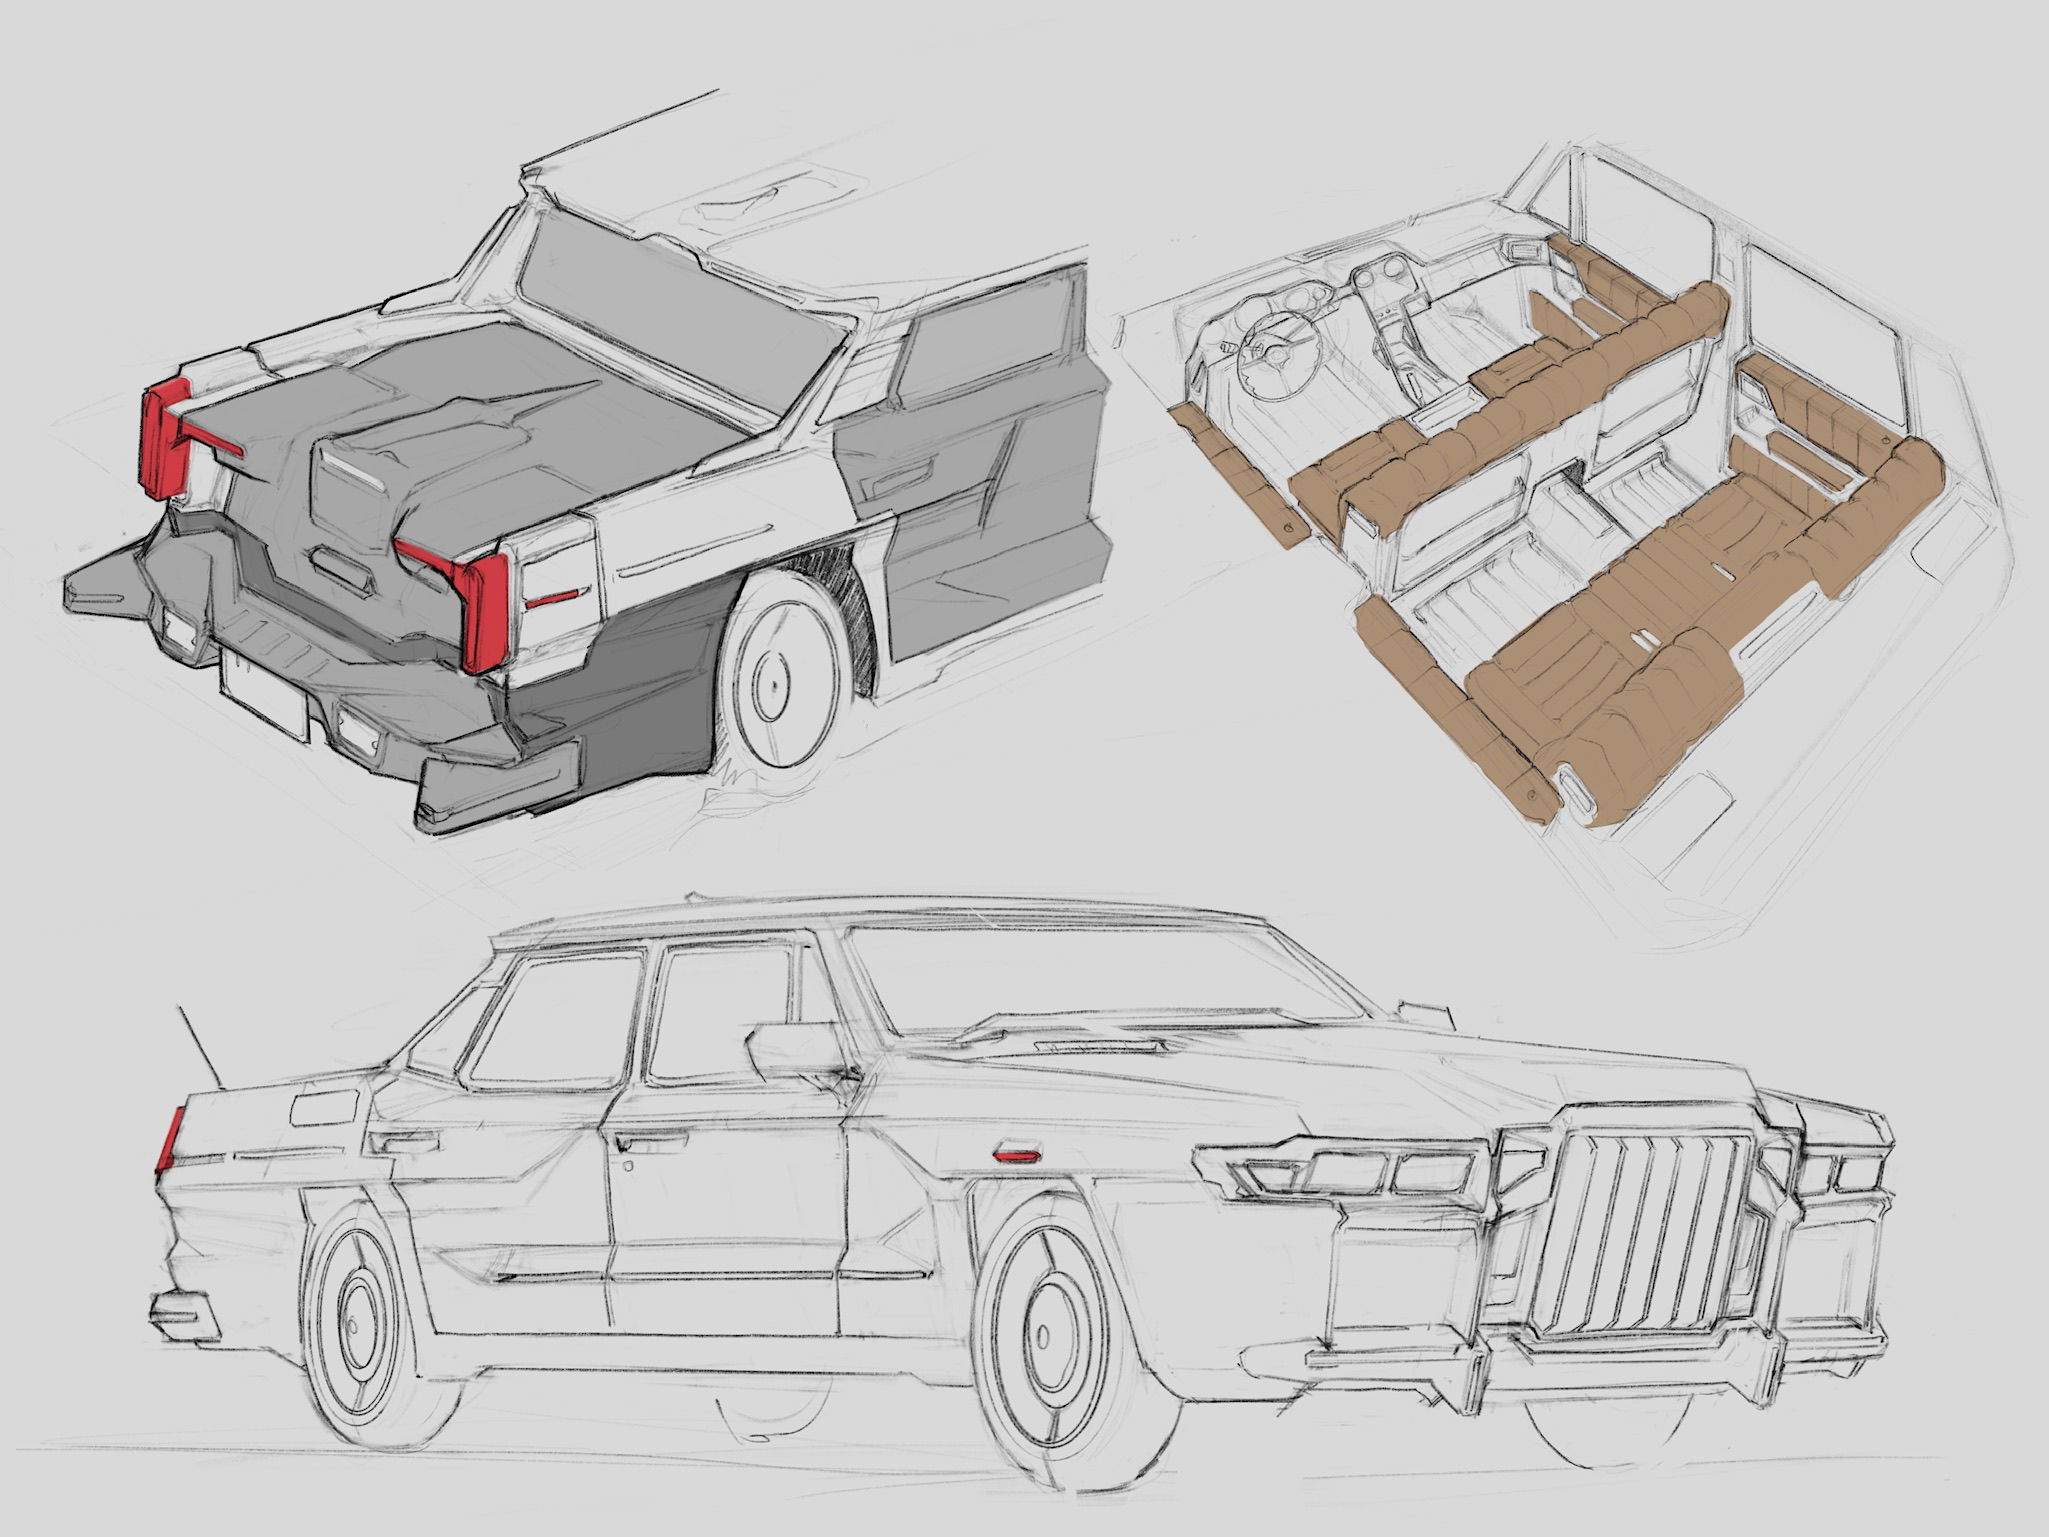
As the entire pipeline with The Projects was rather unique in a way that I could hold in my head the image I wanted to achieve in the very end and didn't have a team I had to propagate it to, I didn't require elaborate blockouts for street layouts, modules, structures, props etc.
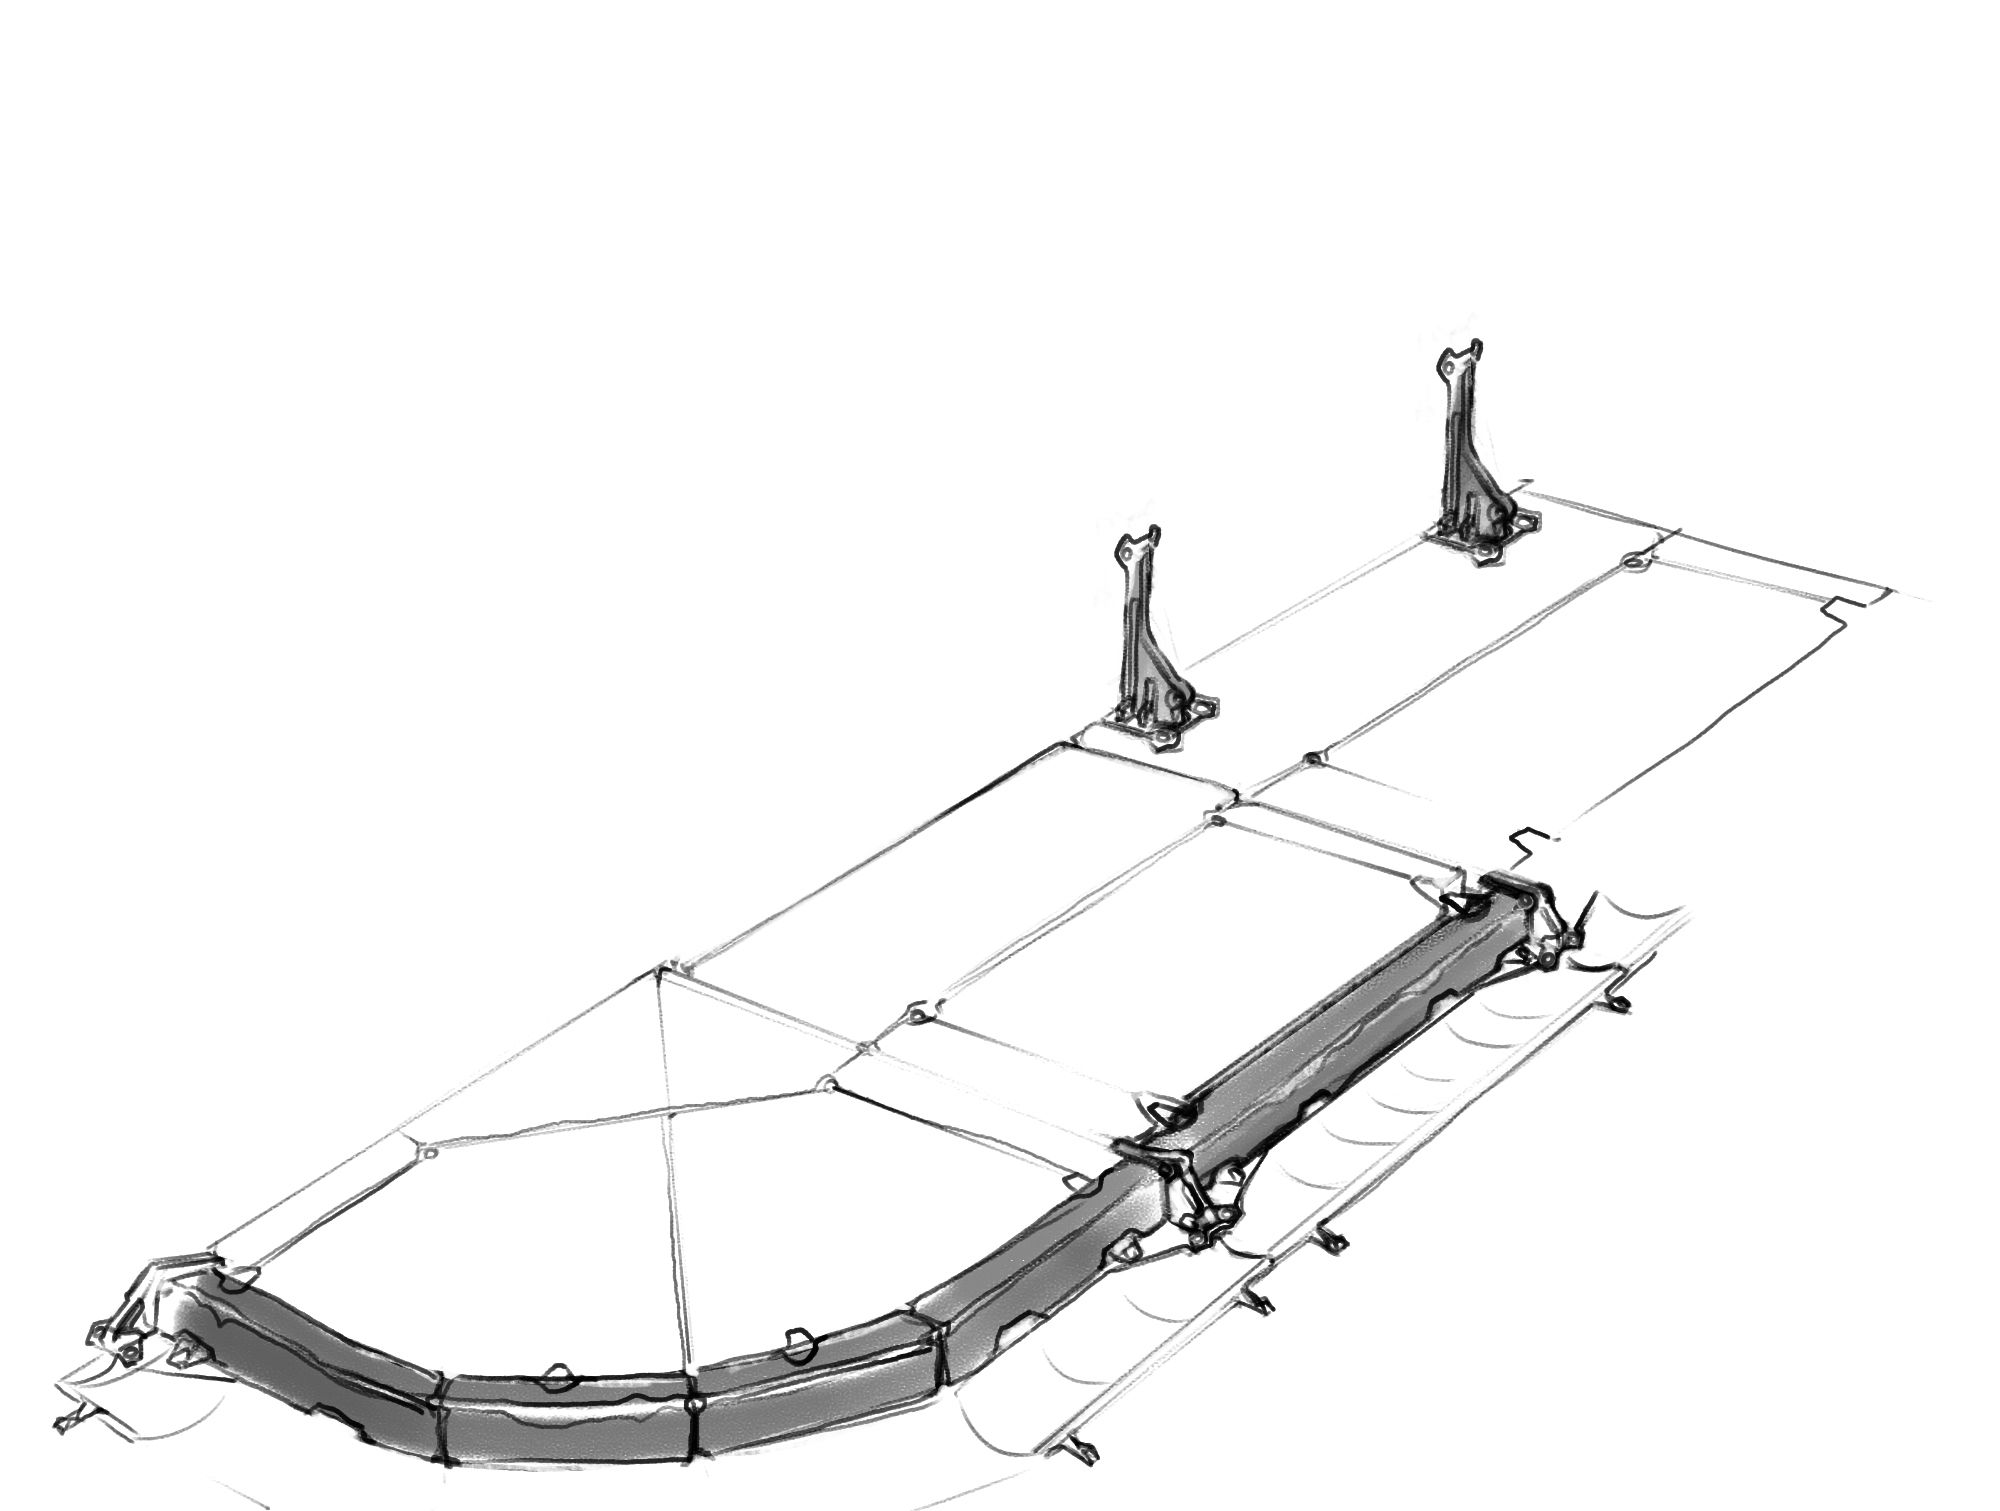
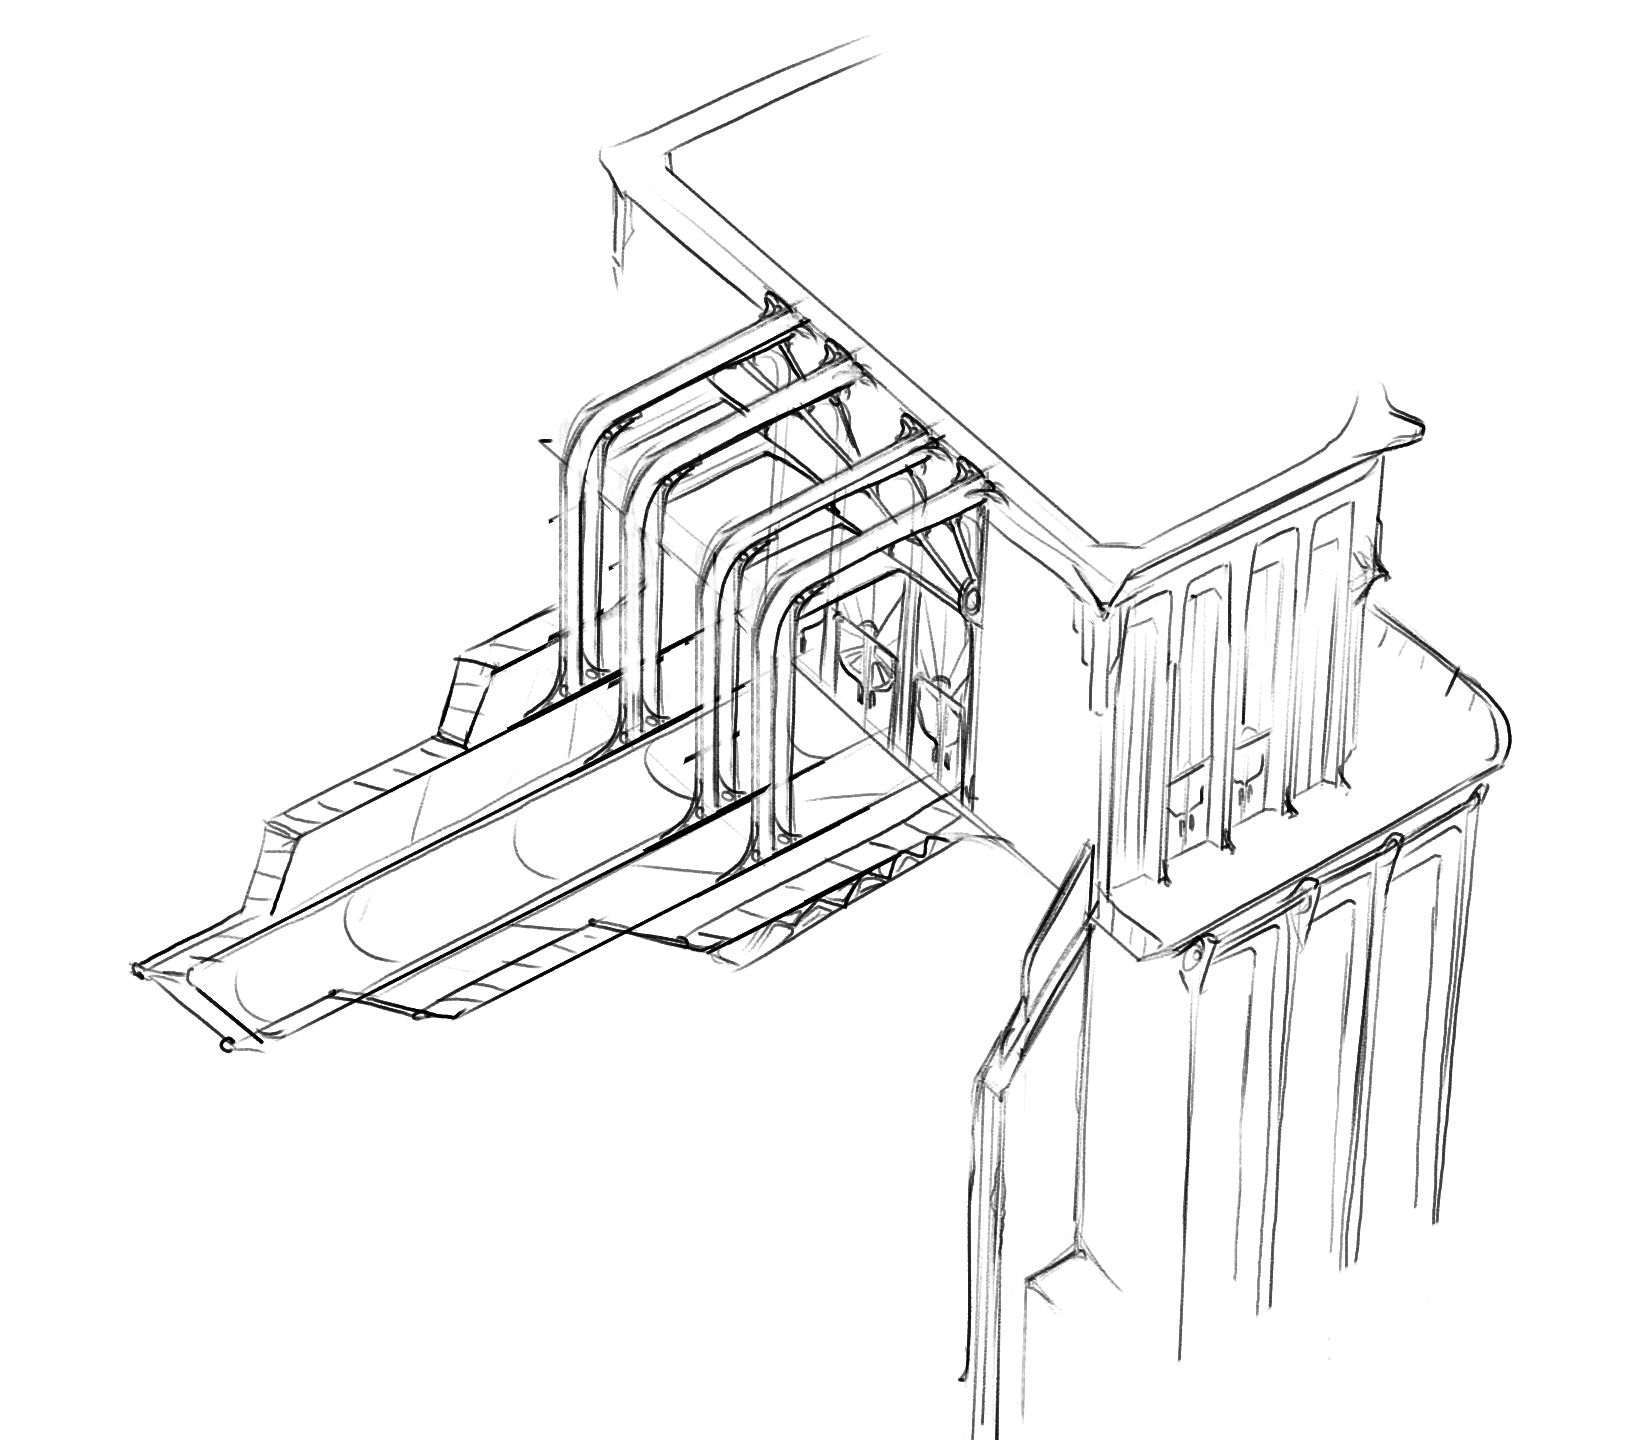
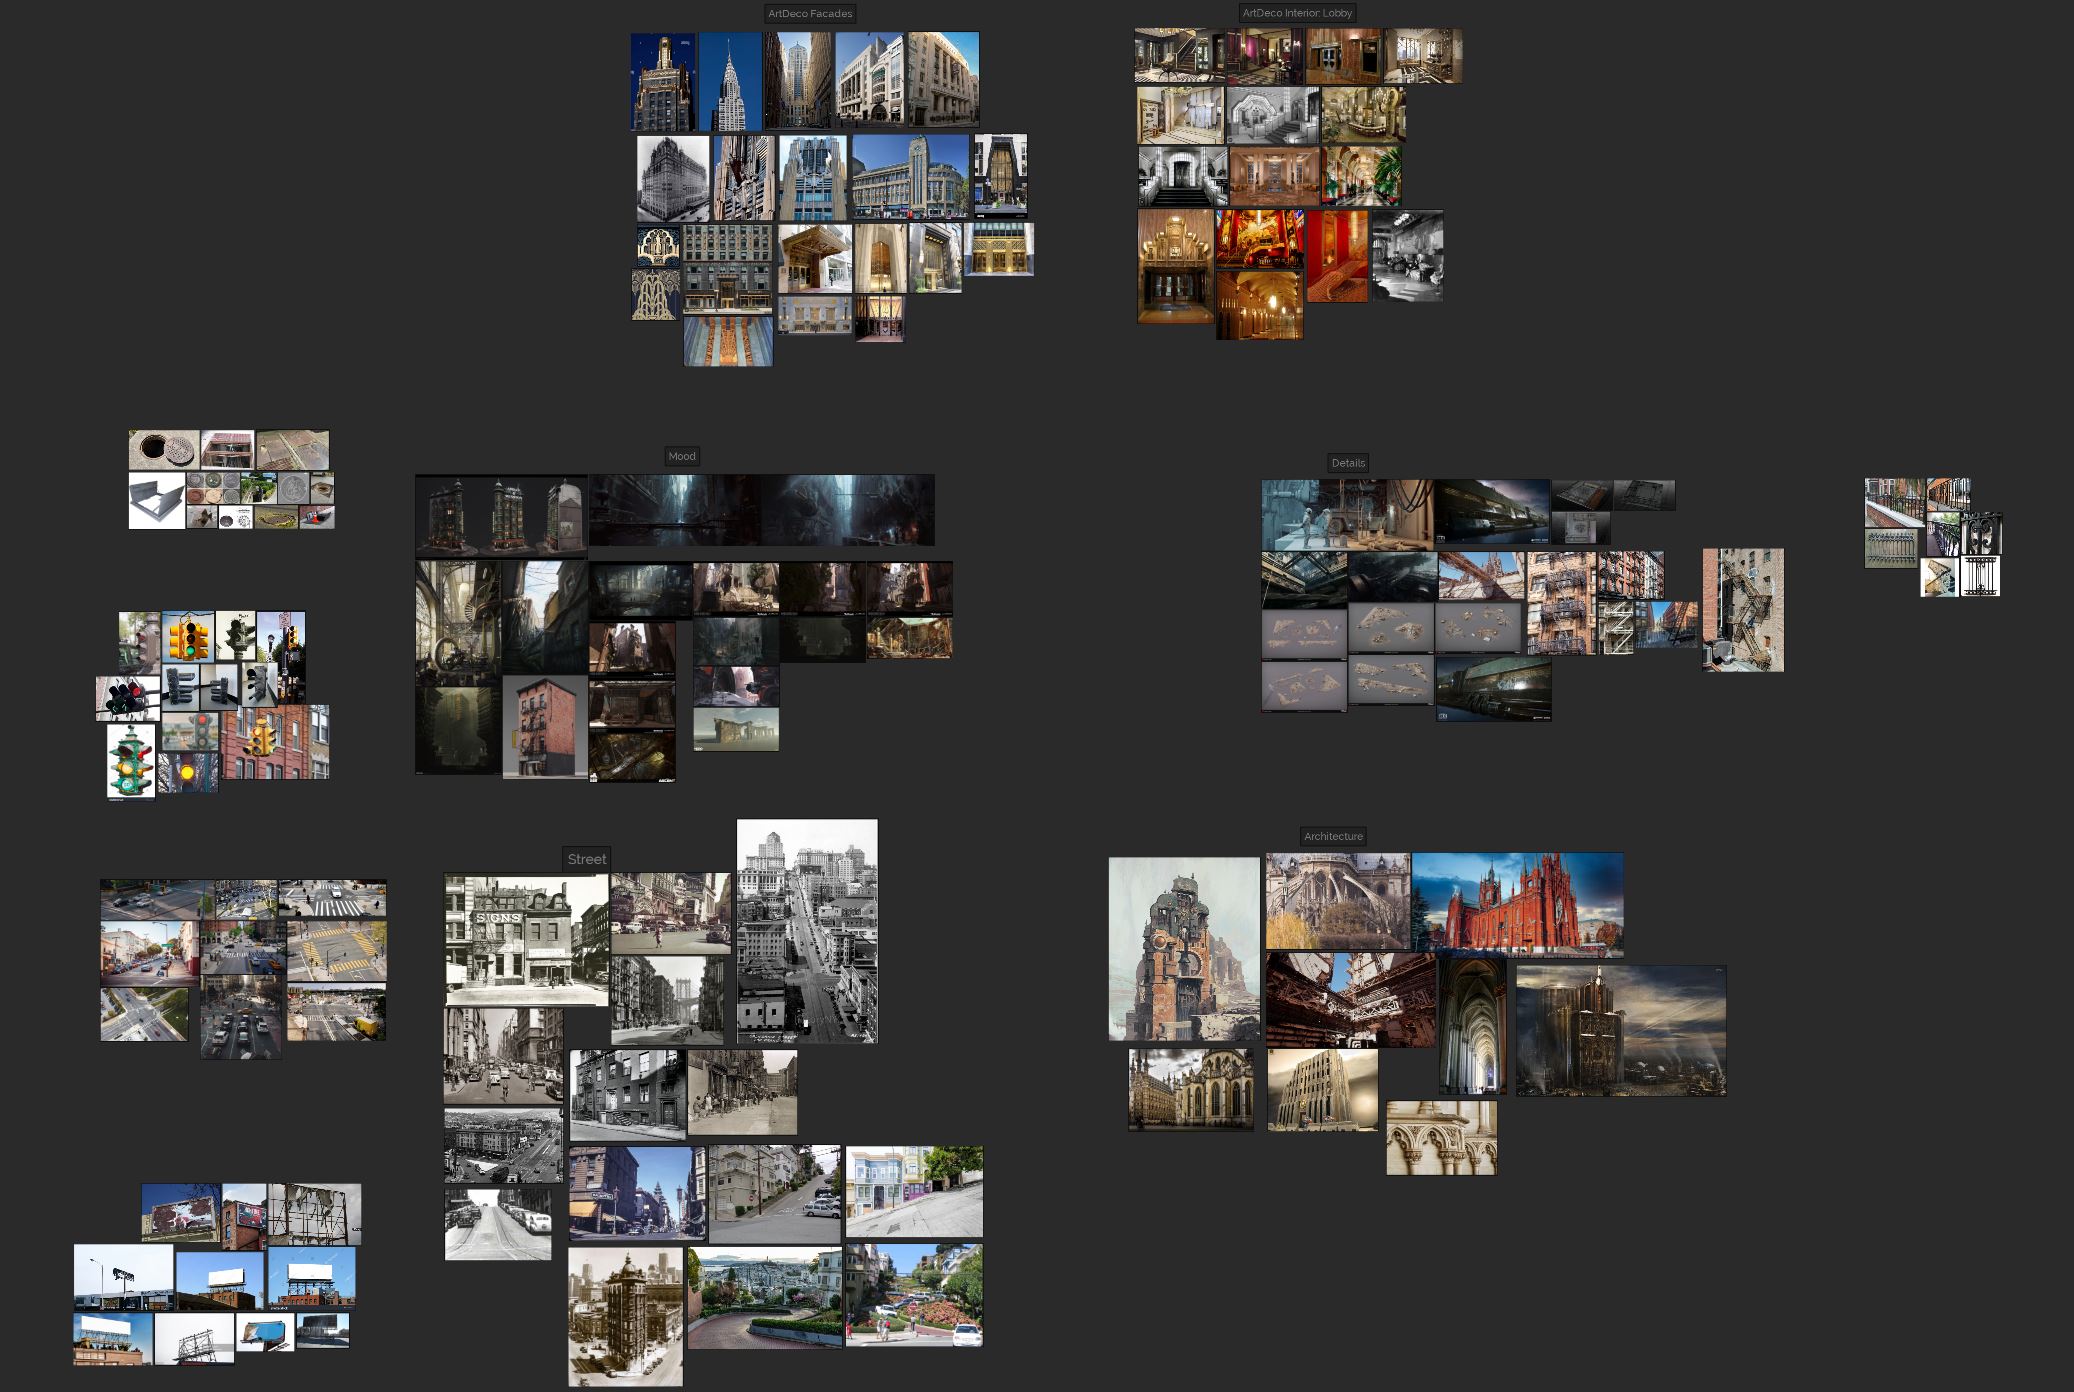
What I settled with was a few general sketches to keep the design language even and then a bunch of photos of various streets and buildings.


Back to the modeling, after completing some initial modular kits, I started adding one finished group of assets after another to a spot that was entirely empty before which was akin to adding pieces to a jigsaw puzzle instead of a more traditional iterational approach, essentially bypassing the blockout stage at this point altogether.
The pros of such workflow are huge time savings from the fact you don't get sidetracked by seeing a bunch of unfinished assets in the scene and having to decide which one to work on next and then only bringing it so close to the finished state anyway.
Instead, when you see that a group of assets that fill a particular role in the environment (like a kit of large dumpsters and garbage bins) is missing, you model and texture it, integrate, propagate and then see what else is missing.
Rinse and repeat.
With enough practice and a clear undestanding of where you want to bring your project, it saves a lot of time and eliminates having to go in circles between a bunch of stuff without truly finishing anything.
Set a target level of quality and completion for your assets and keep to it.
This bar will naturally rise little by little with every new group of assets you create while still keeping a consistent level of quality across the project.
This approach will not fit everybody or every style of project, however if you're comfortable with your tools and management skills, if you plan your environment to be large and have a big library of assets, I believe it might be worth a shot.
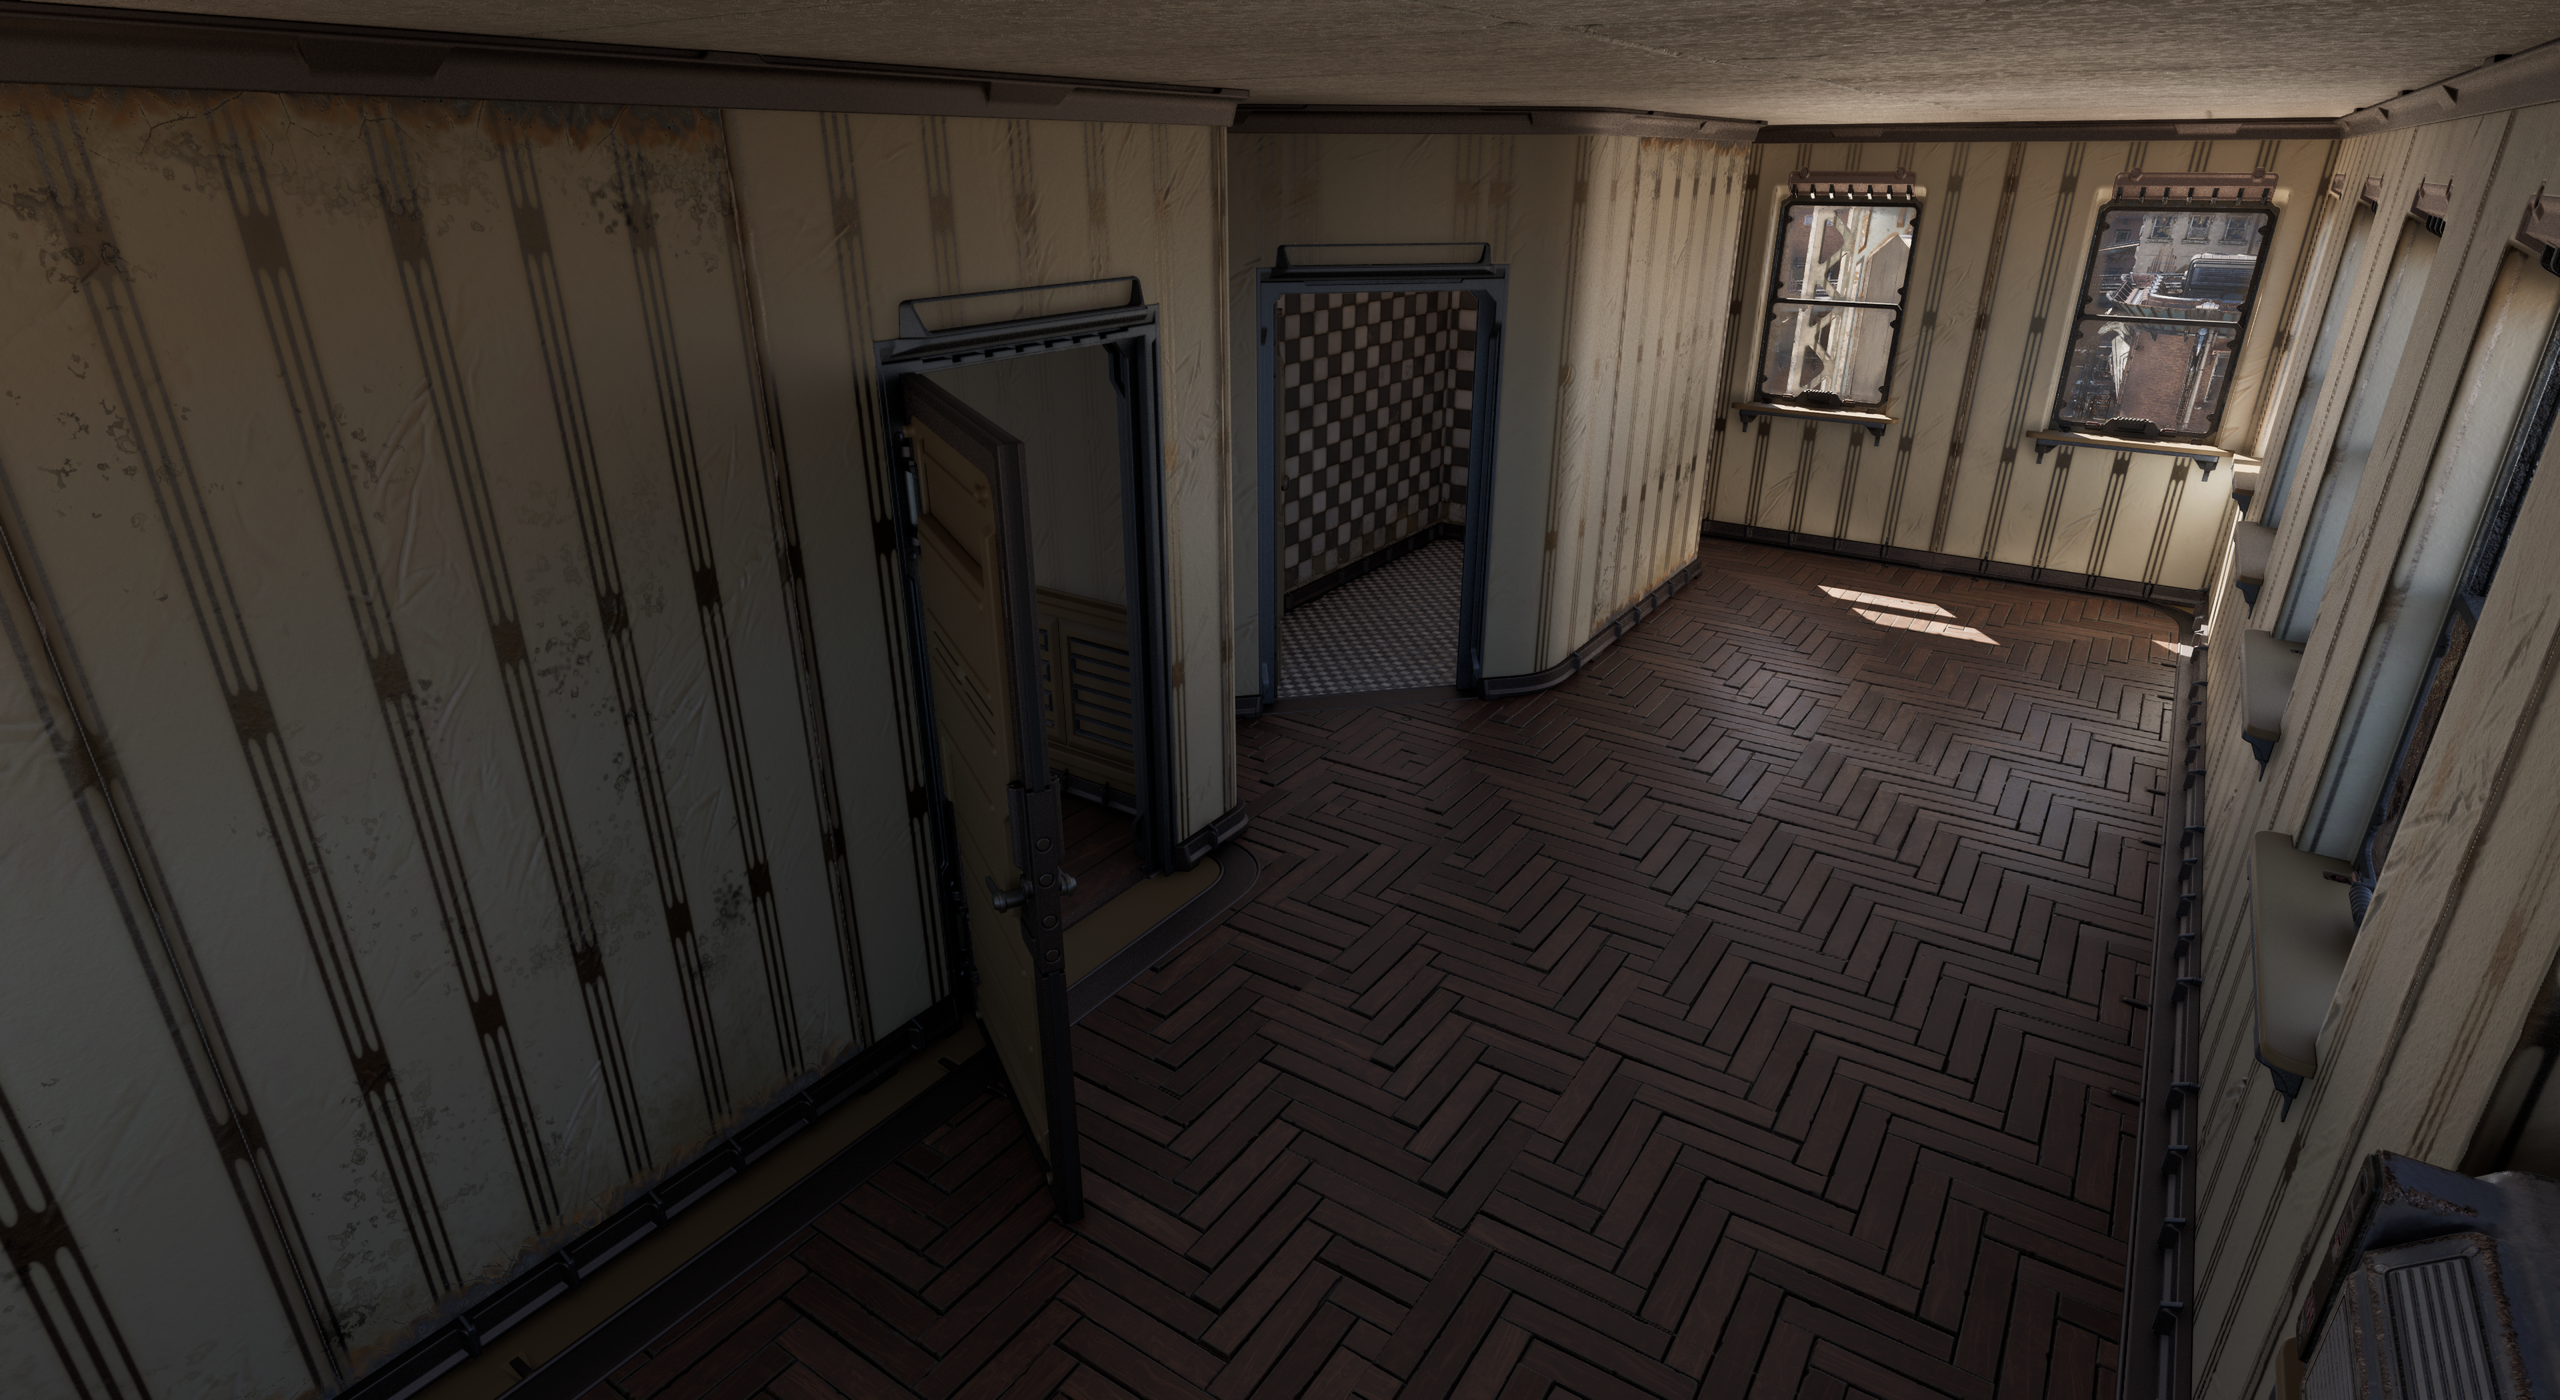
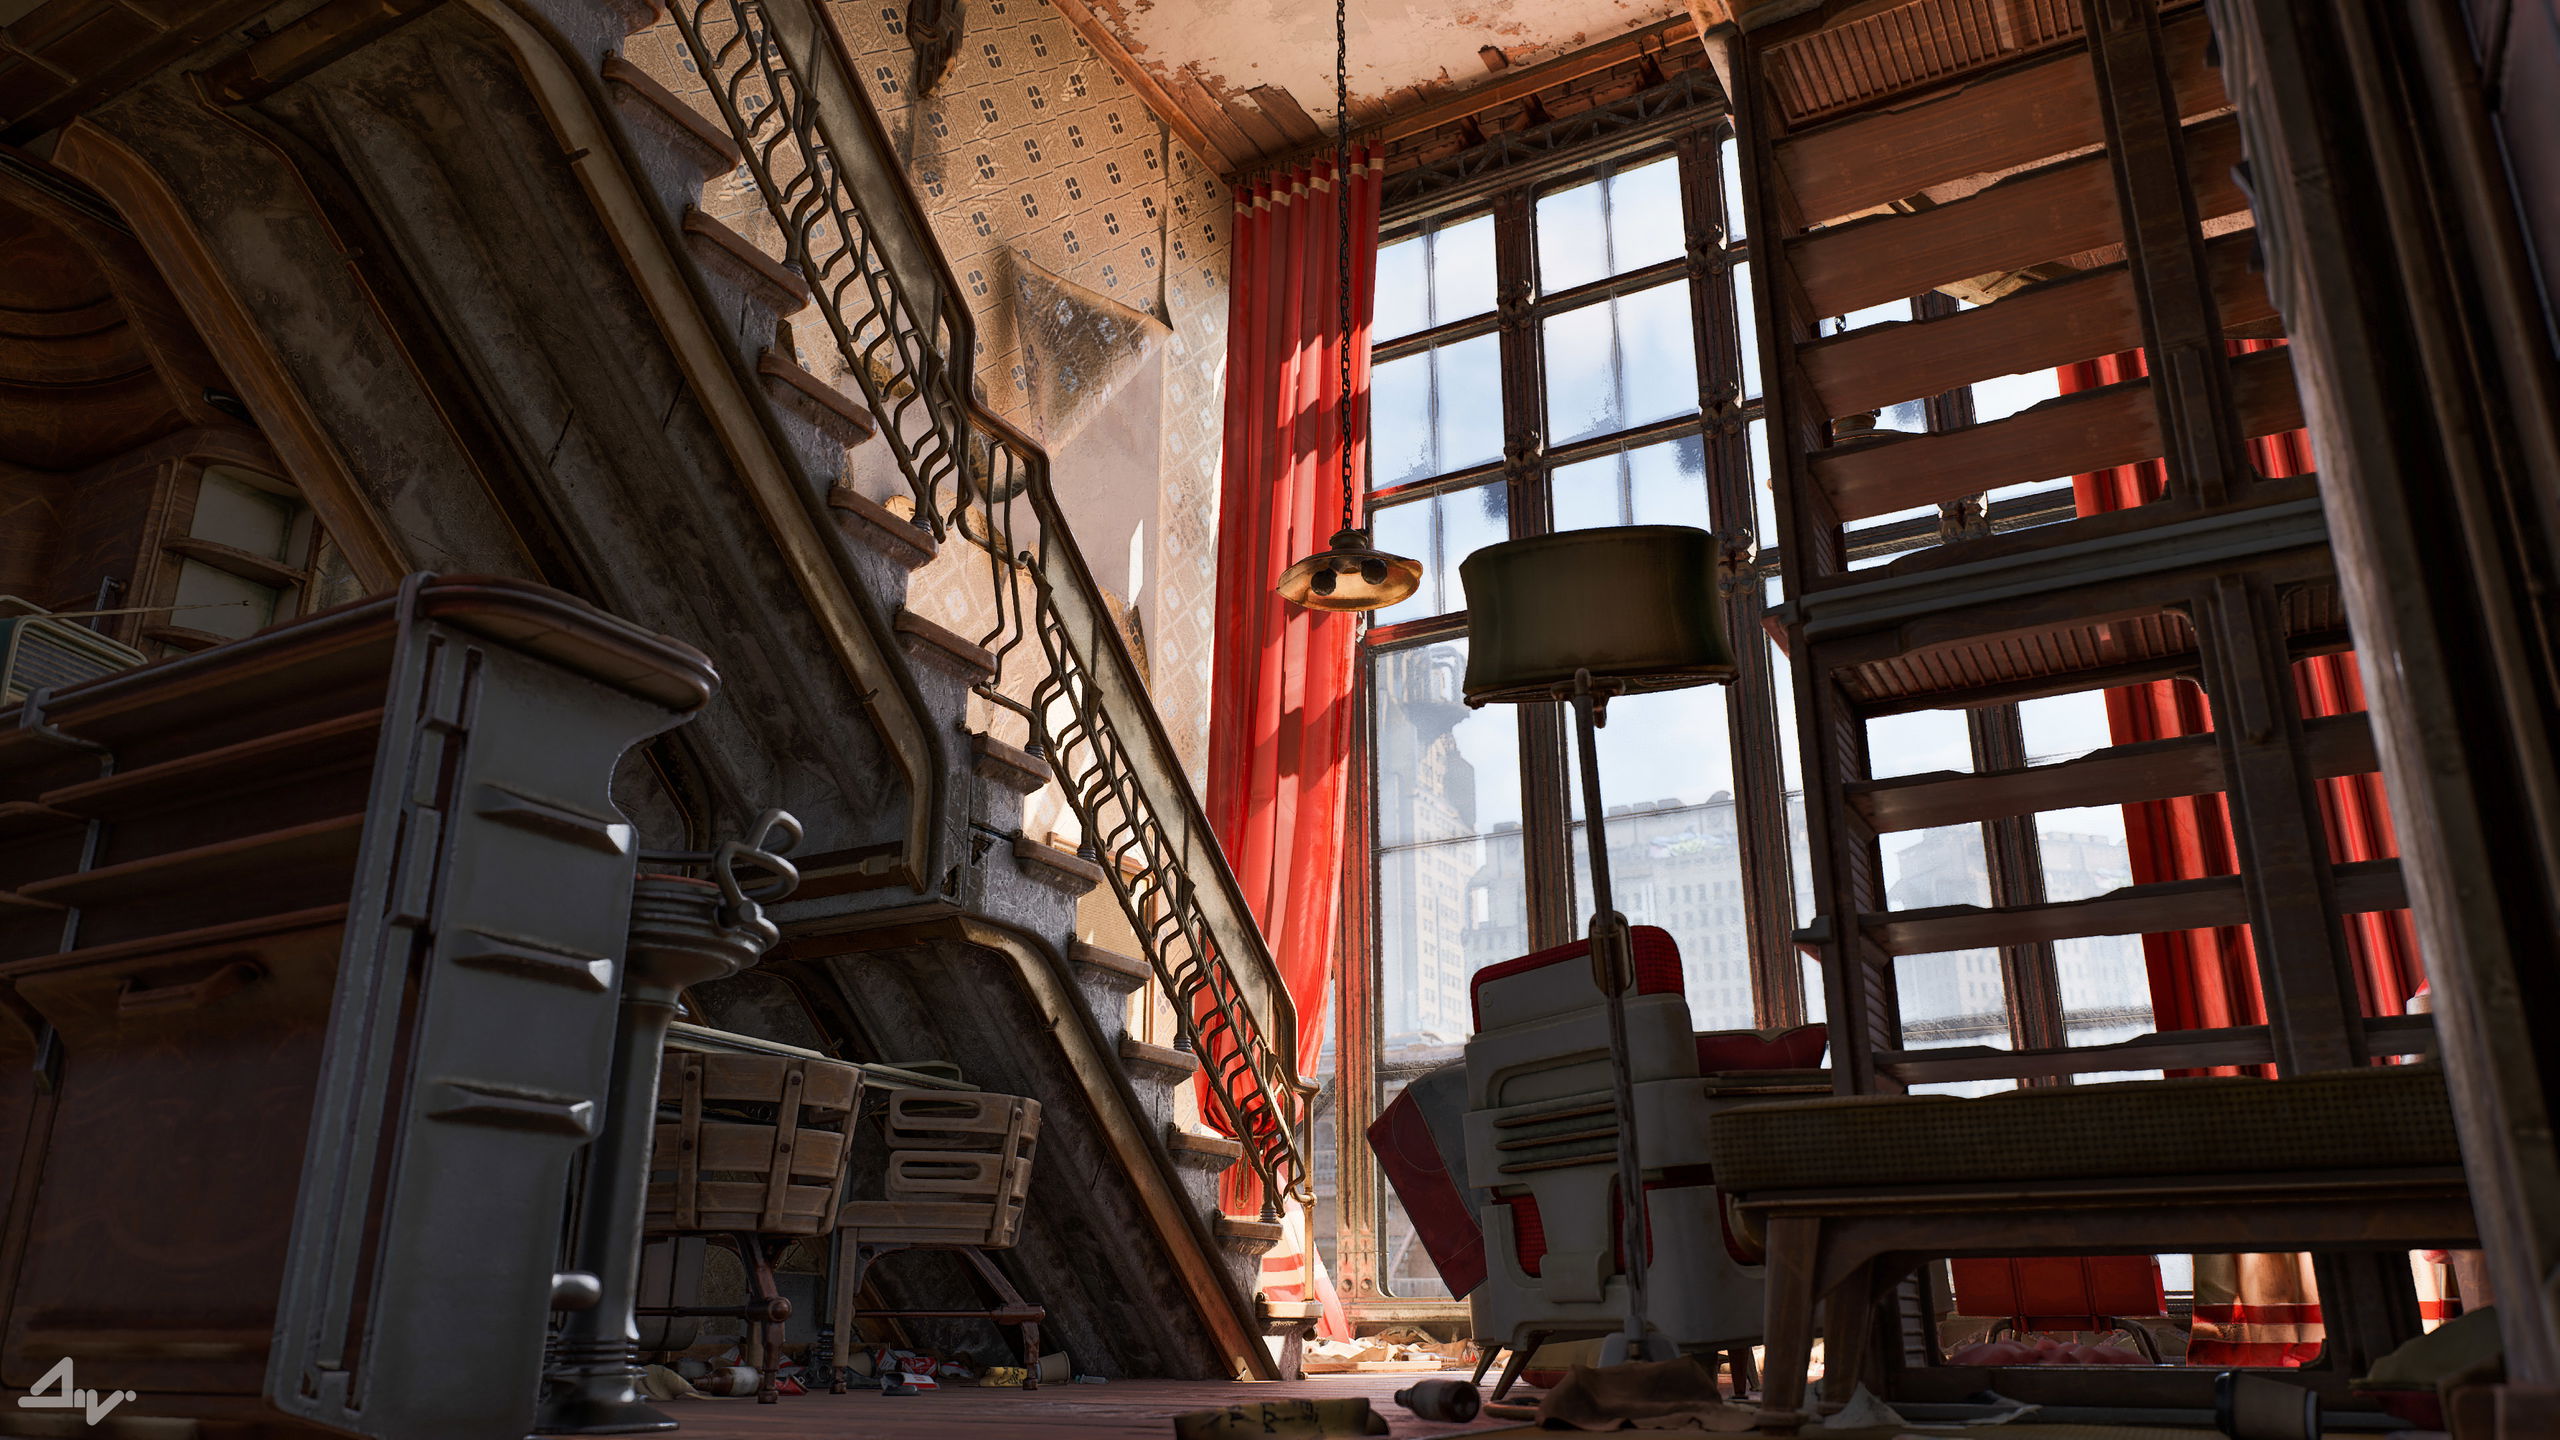
Interiors and Prefabs
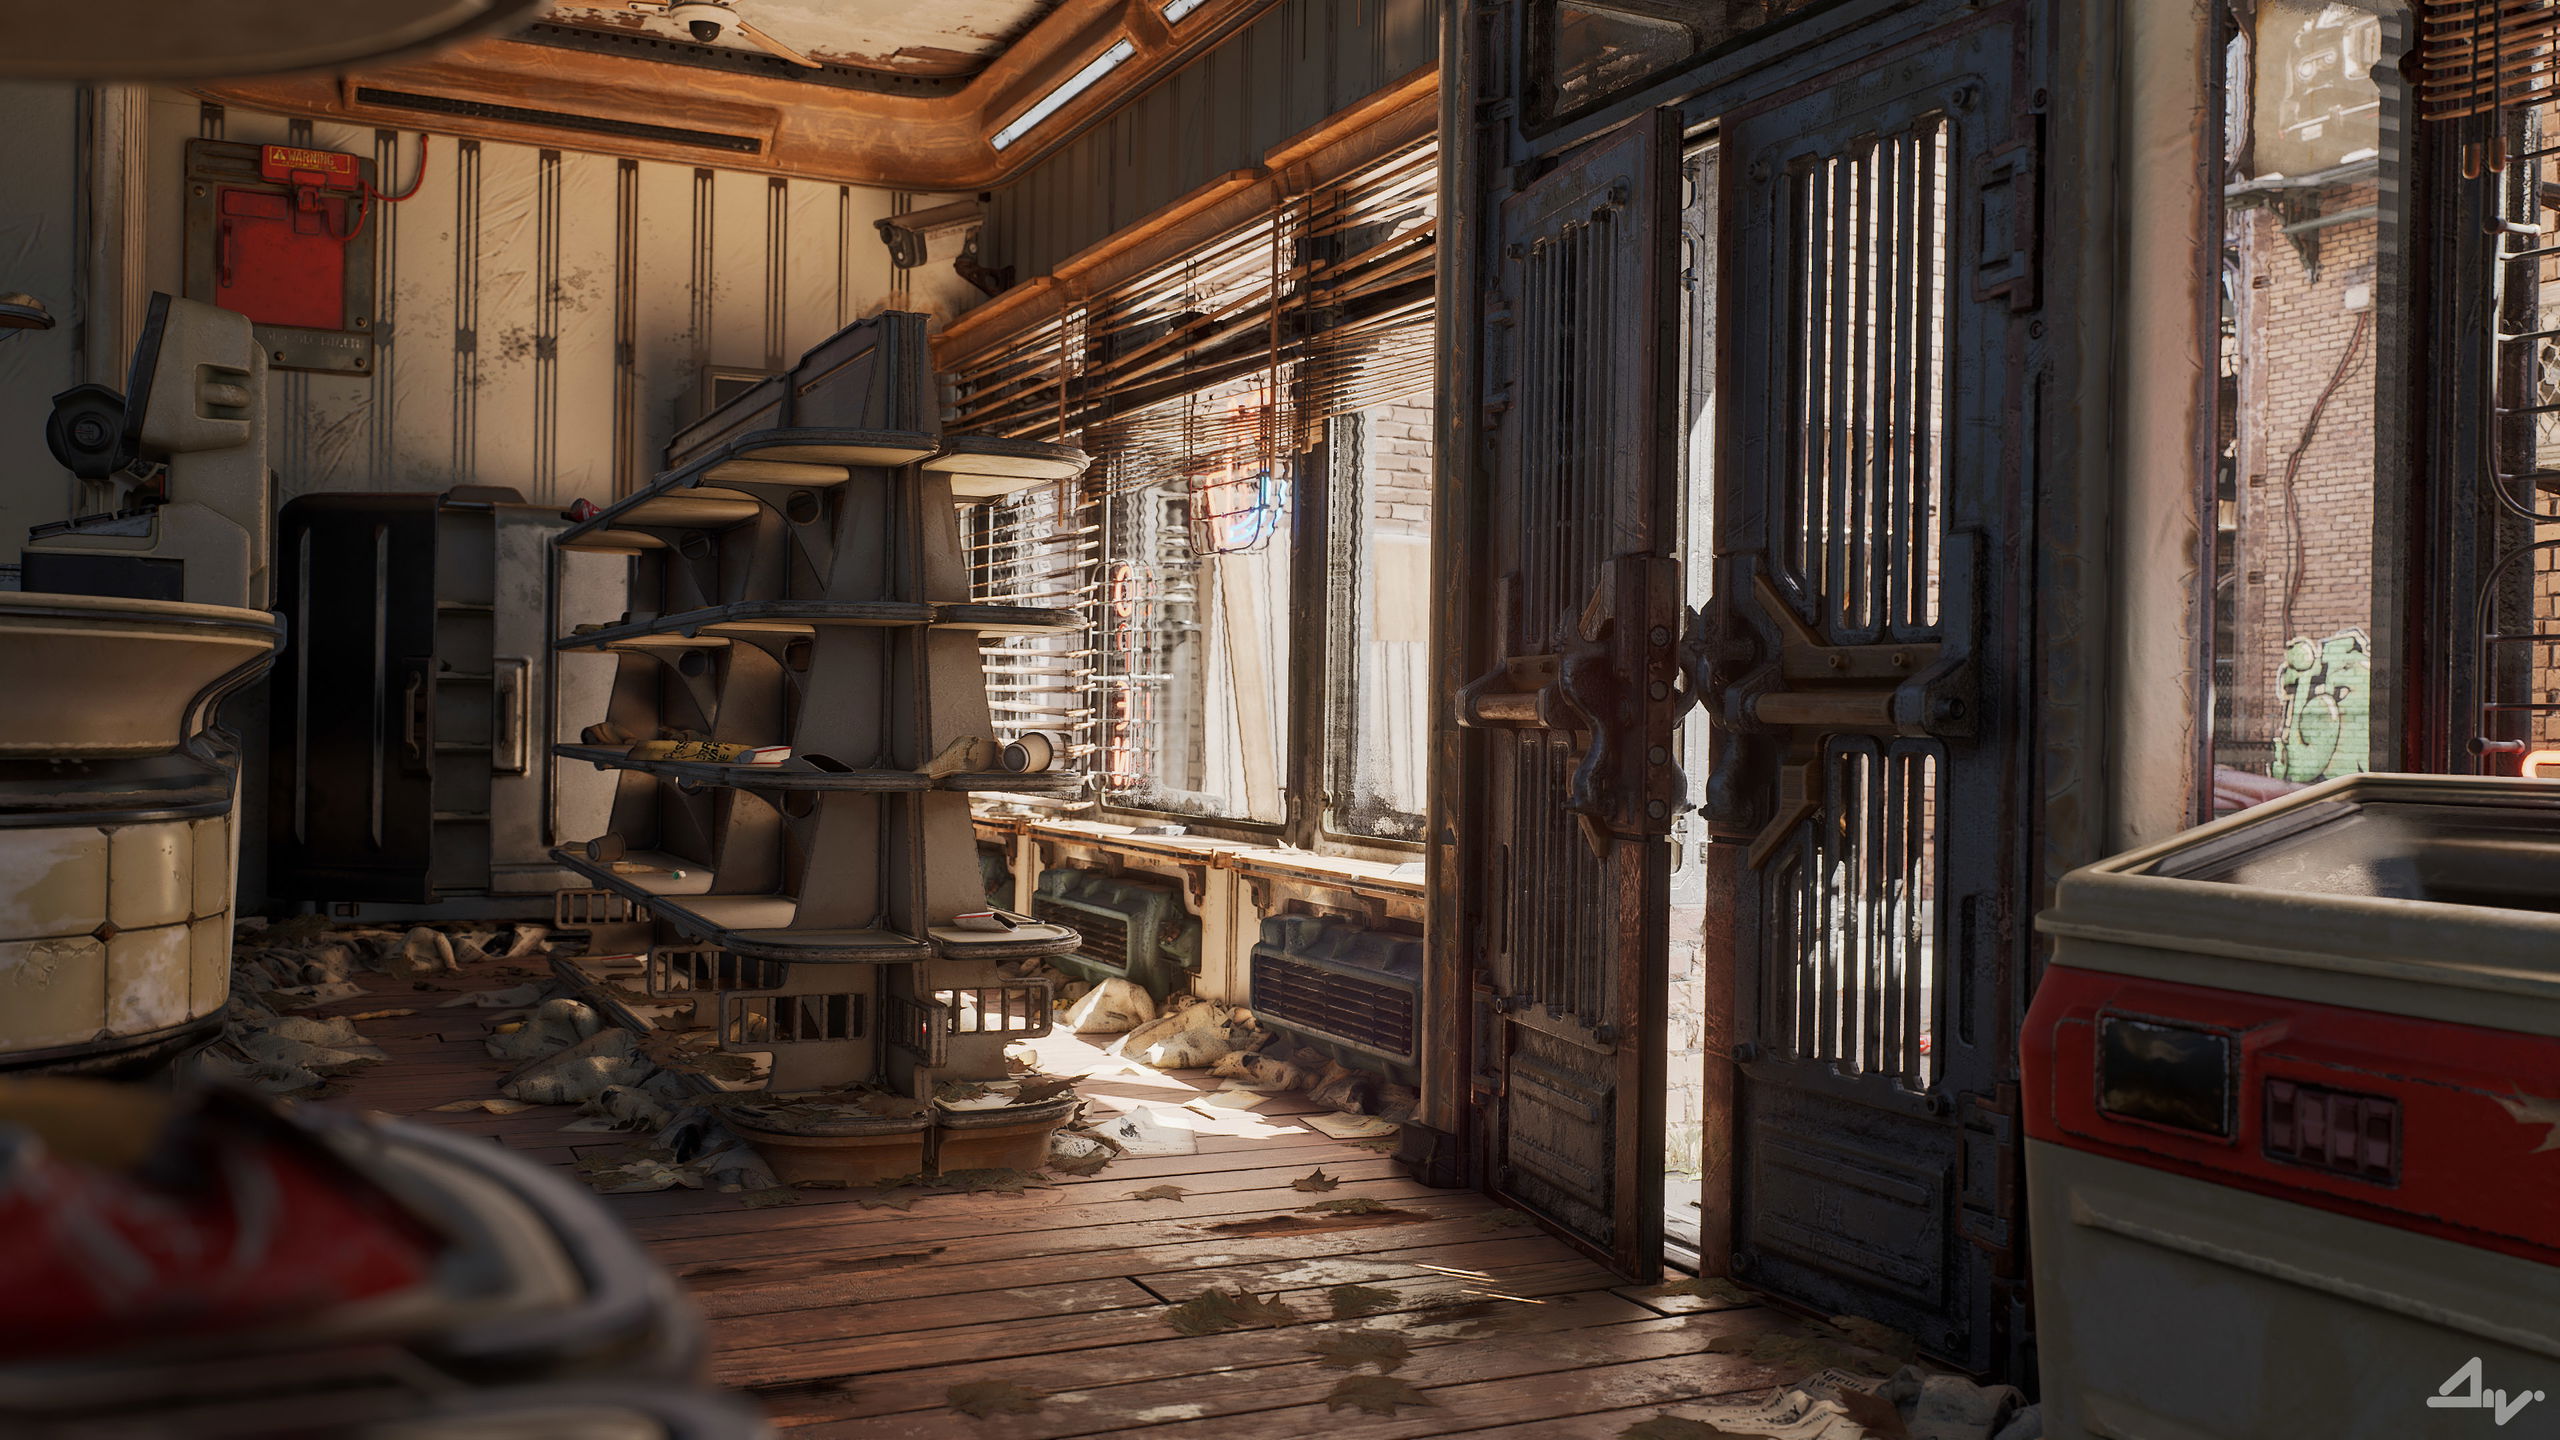
As the exterior portion started to get fleshed out with more and more complete kits, an ever growing material library and another few iterations of lighting, I switched my focus on the interiors to bring them up to par.
The general approach was similar to the exteriors, where I would go from big (modular layout) to small (props; foliage).
At one point I realized that lighting inside the buildings is a growing issue.
While the exterior's state was fine, the interiors wouldn't propagate enough light.
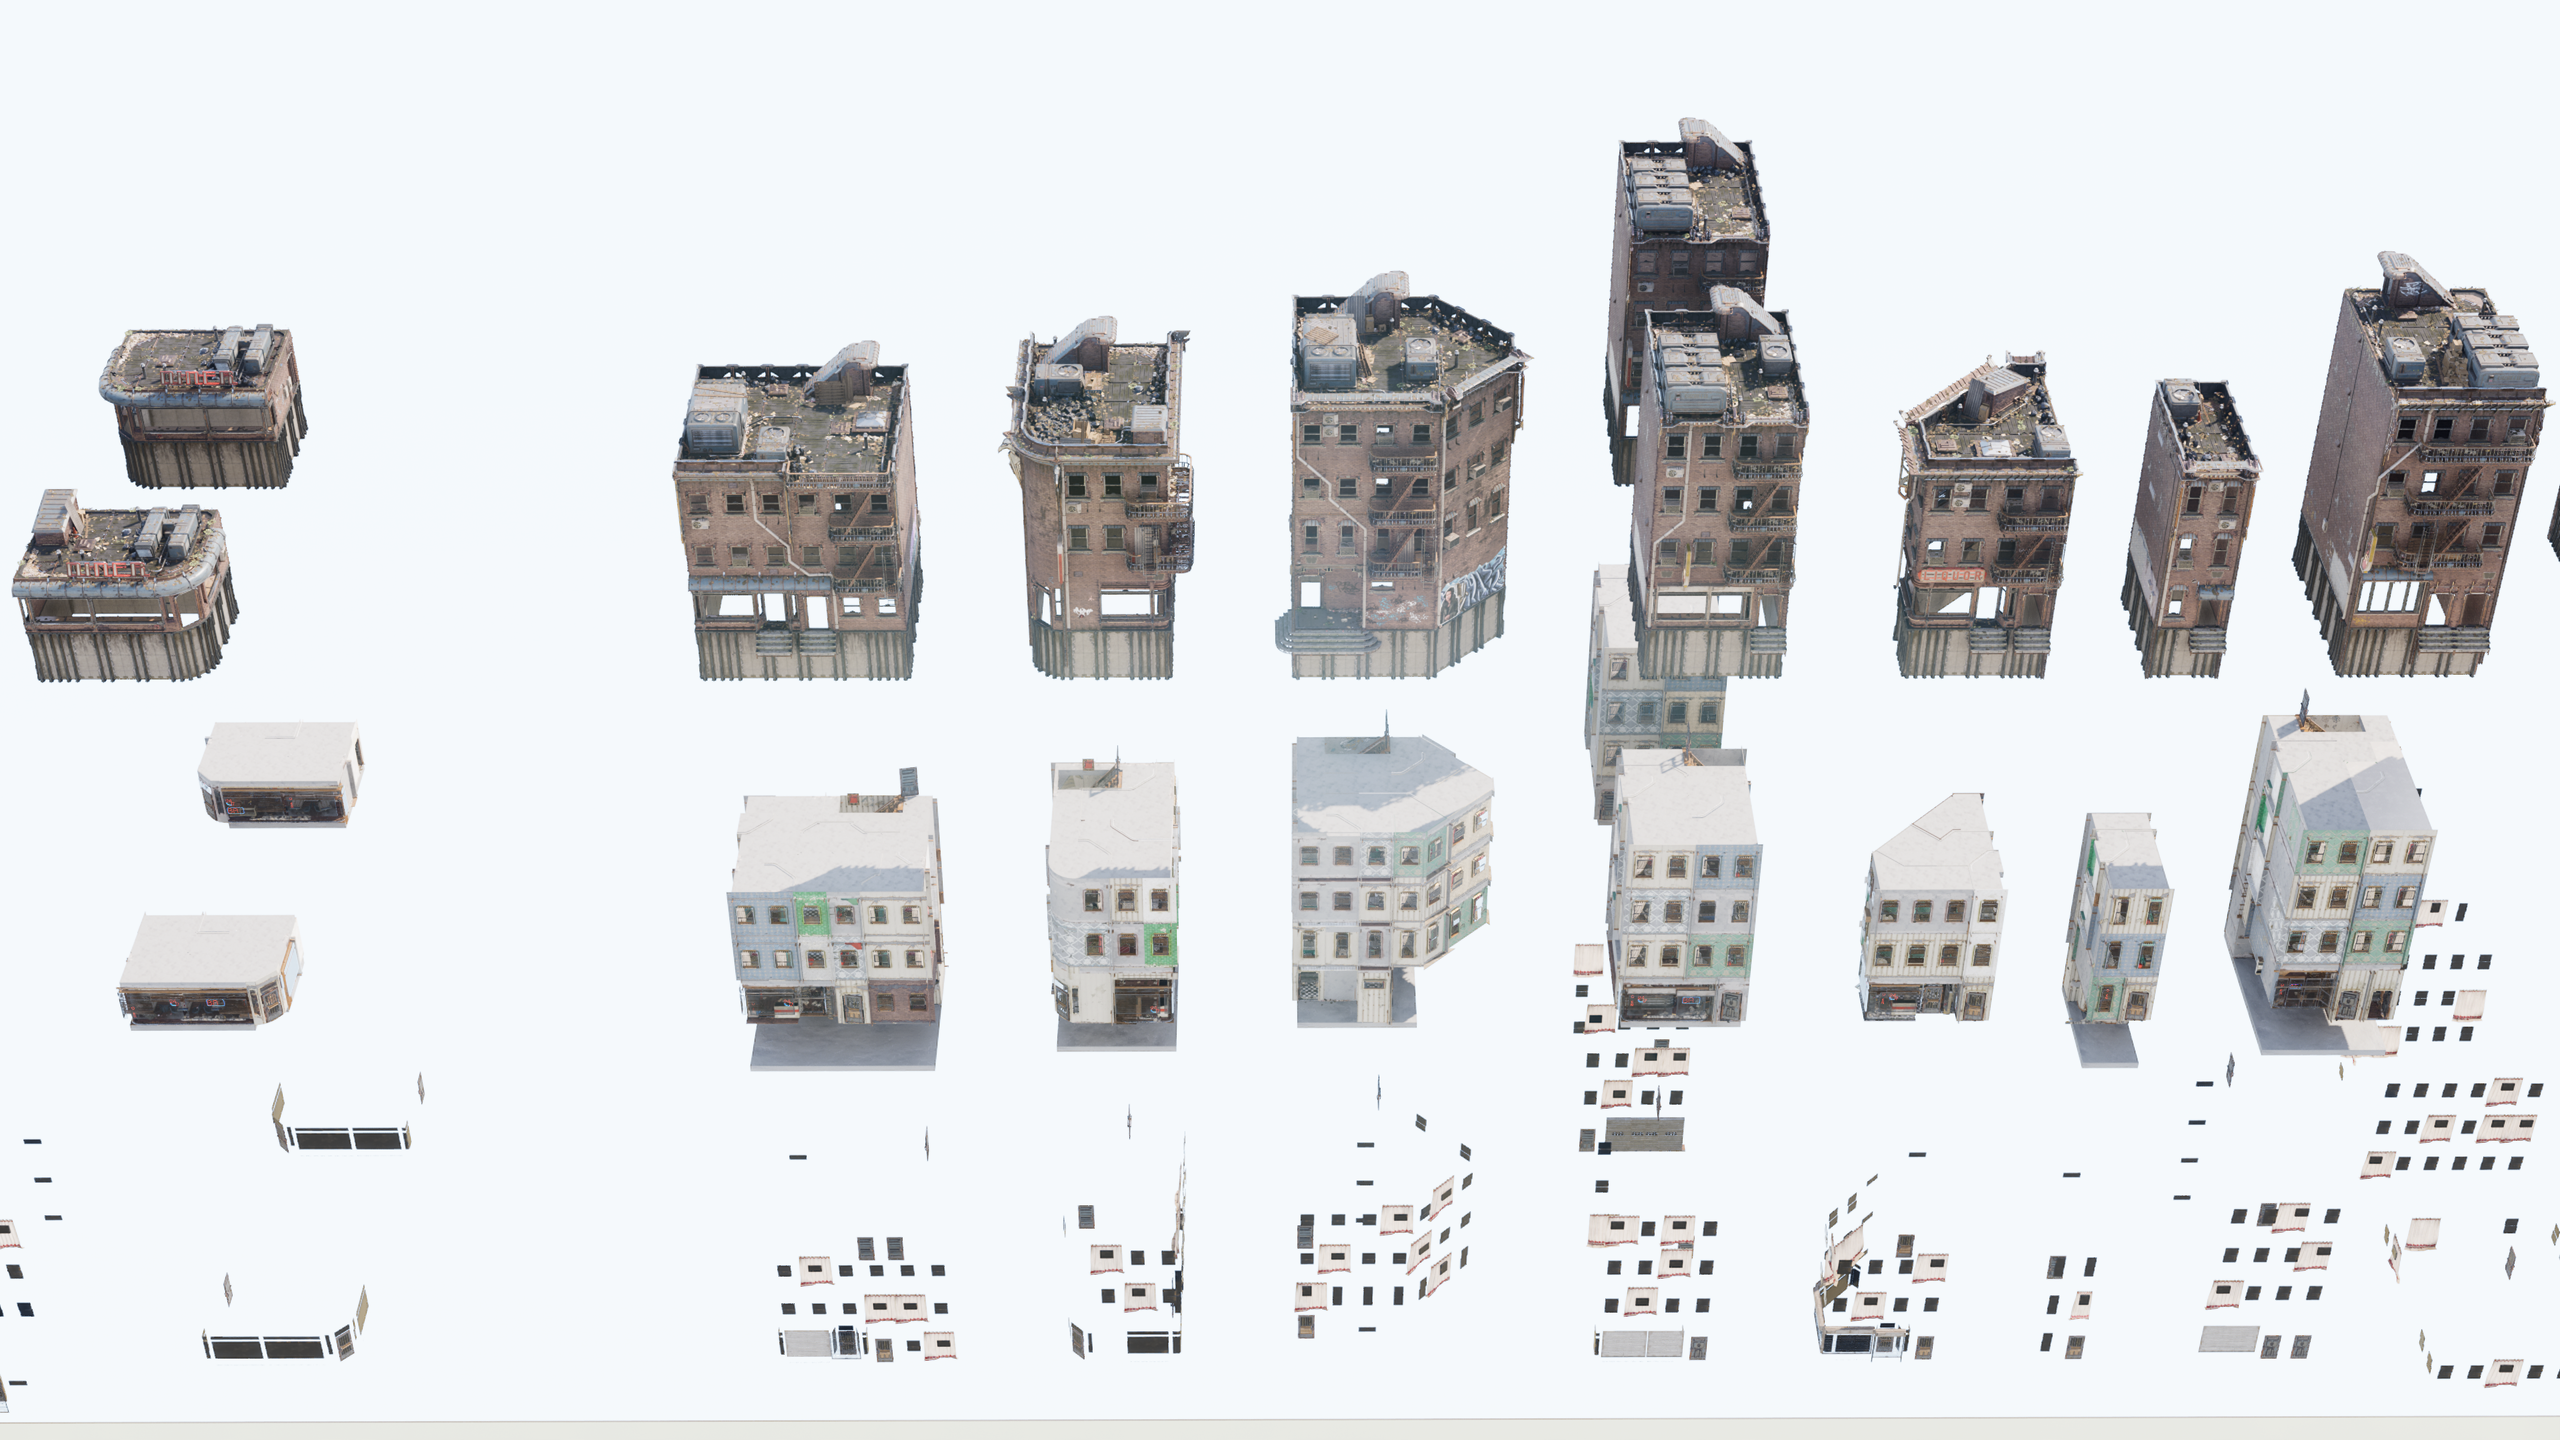
Along with that came another problem where all the vista buildings, which were the exact same prefabs as in the active area of the map, started to become a bit too heavy for the performance from having all of them include interior geometry.
To combat this I separated all the interiors from their hulls into their own prefabs.
Another prefab was made to serve as an opaque cap to close the now open windows and doors of those buildings that didn't require an interior.
This allowed me to make the vista lighter, while still propagating changes to the building hulls there.
Keep in mind that the goal of this project was to get the prettiest looking result while not allocating much time to optimization, hence this approach proved worthy.
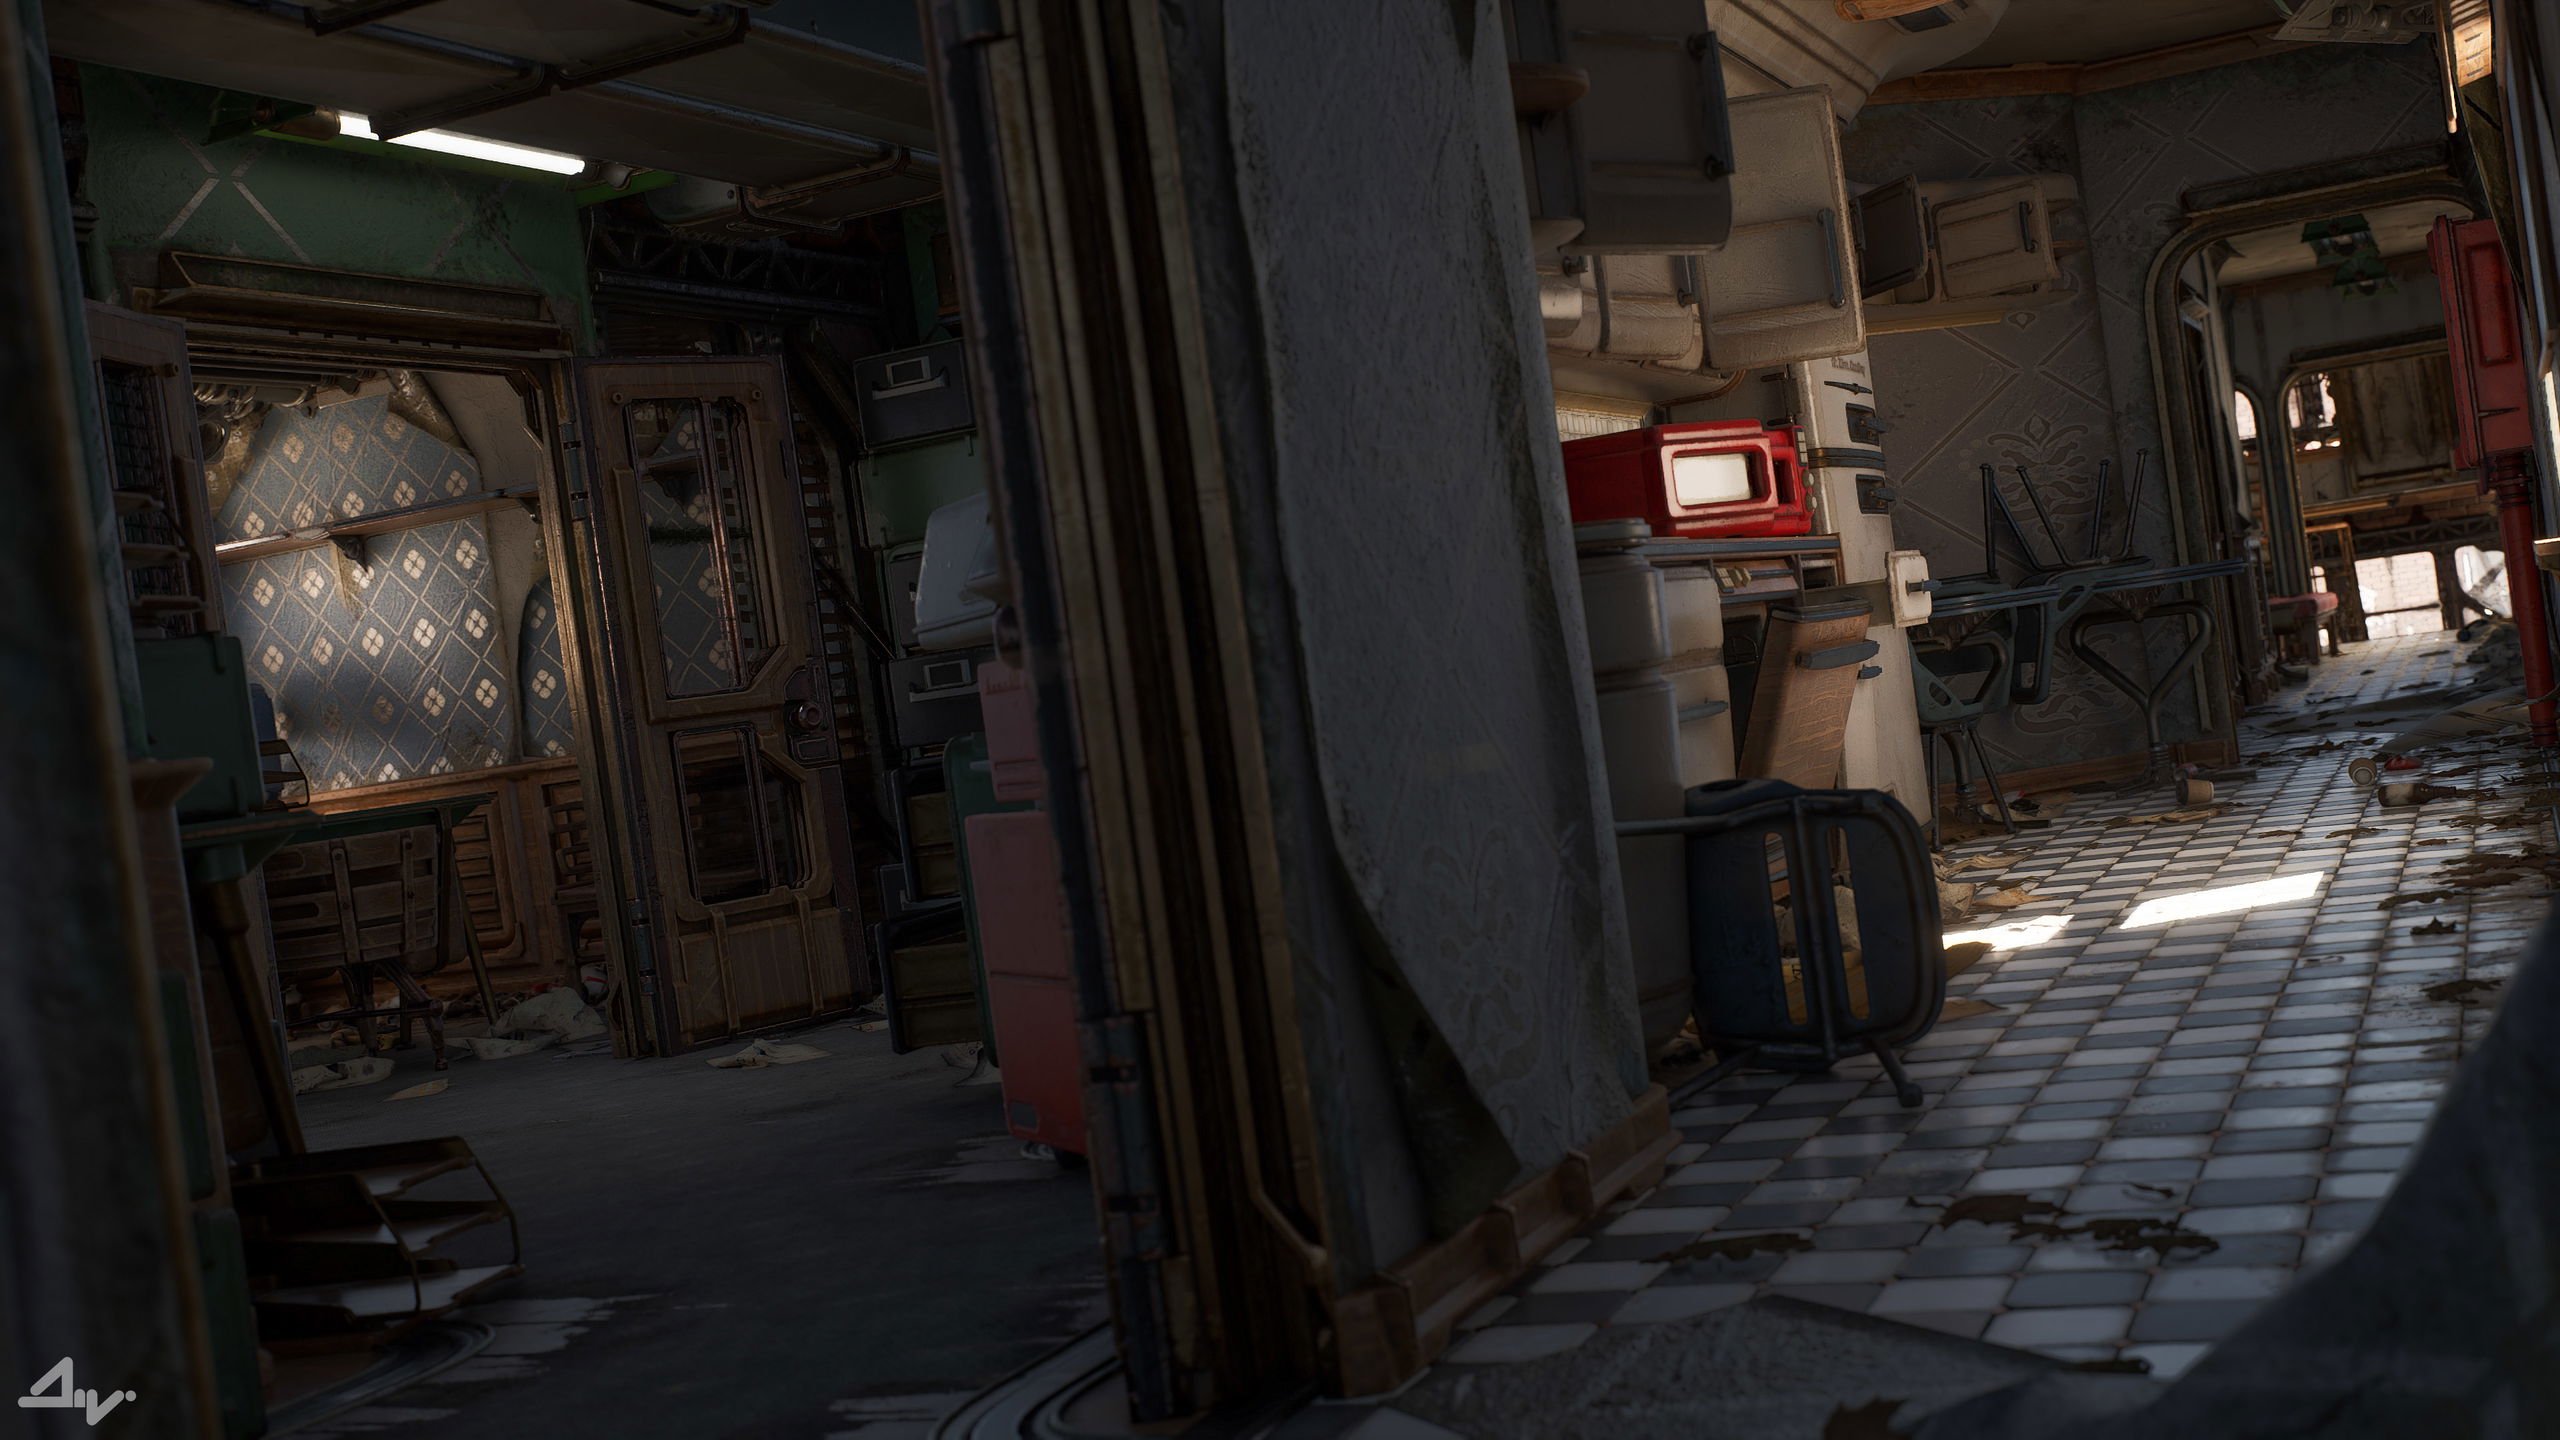
Prefabs in this situation are Packed Level Actors (PLAs) nested inside a Level Instance.
PLAs are used to instance static meshes in a non destructive way, however that is the only type of actor you can have there, so then you put decals, foliage and blueprints into the Level Instance, which becomes your finished prefab.
Another thing that was done in regards to the issue with interior lighting was adding a Post Process Volume (with a priority set higher than that of the unbound PPV of the exterior) to every single interior prefab that would carefully trace its shape so when the camera is inside the building, there would be minimal areas where the interior PPV wouldn't affect it.
The interior PPV would have its exposure and other post process values tweaked so that it would play along simultaneously with the exterior PPV by overriding same values listed above without having to actually change any of them in the exterior PPV.
Somewhere during production the performance started to get a bit slow.
Having every single asset just sit in the World Partition outliner on its own was becoming an issue for drawcalls and framerate at this point so static meshes had to be broken up into PLAs roughly in the bounds of one city block.
An additional Level Instance was created, which would house the other actors in the area like blueprints, cars and certain arrangements.
After converting everything to the new set up, I could again have the entire map loaded in all at once and still get comfortable enough framerate to continue working on the level.
Wrapping up
At this point not a whole lot of things was left to do: more decals had to be created to add interest to surfaces via grime, graffiti etc; foliage atlas and meshes had to be made; trash assets were needed to give an unkempt and abandoned feel; basic vfx to add more break up and dynamic to the scene.
I then created all the things listed just like all other assets in the project with Photoshop, Substance Painter, Substance Designer and 3ds Max.
After the final lighting tweaks and 2.5 years of work, the city was finally complete.
Thank you for reading and best of luck with your next endeavor!


Filipp Sparak – All Links:
Latest posts

PBL Database: realistic lighting for UE5.7 by Arthur Tasquin
Discover Arthur Tasquin's PBL Database: the toolbox for UE5.7 that teaches you how to manage light realistically, with correct physical values and reliable references. Perfect for learning and improving your workflow.

Buona la Prima - Episode 38
The Great Debate: Self-Publishing vs. Traditional Publishing

A Step Towards Interoperability: Unity and Epic Games Announce Strategic Collaboration
Unity and Epic Games are partnering to create a more open gaming ecosystem. The agreement brings Unity games to Fortnite and Unreal Engine support to Unity's e-commerce platform.